
As an Amazon Associate I earn from qualifying purchases.
Twitch announced a brand new feature called Alerts by Twitch, where you can create custom alerts directly on Twitch! This is a huge move by Twitch, trying to steal market share from other 3rd party websites like Streamlabs or StreamElements who offer the same style of service. In this guide we’ll show you where to find the new alerts dashboard and how to setup Alerts by Twitch in this step-by-step guide. We’ll be showing you where to setup this up in OBS software but this guide should be relatively similar to Streamlabs OBS or your preferred streaming software as well.
To keep the guide simple, we’ll only be showing how to setup follower alerts on Twitch. Since any other special events like bits, subscriptions and raids all follow the same steps. If you are a new streamer, this detailed guide should work relatively similar to other streaming software like Streamlabs OBS as well. Really it just comes to your own personal preferences on which streaming software you like better!
New Alerts by Twitch Dashboard – Creating an Alert Box Overlay
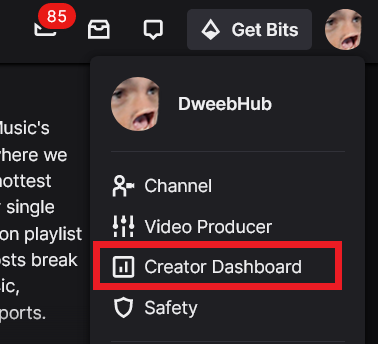
First step, lets open up our Twitch Account and go to Creator Dashboard.
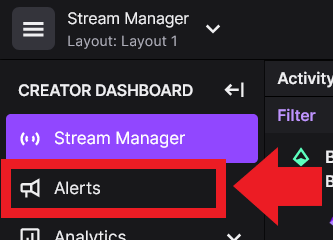
Next step, in the Creator Dashboard menu lets select Alerts right under Stream Manager.
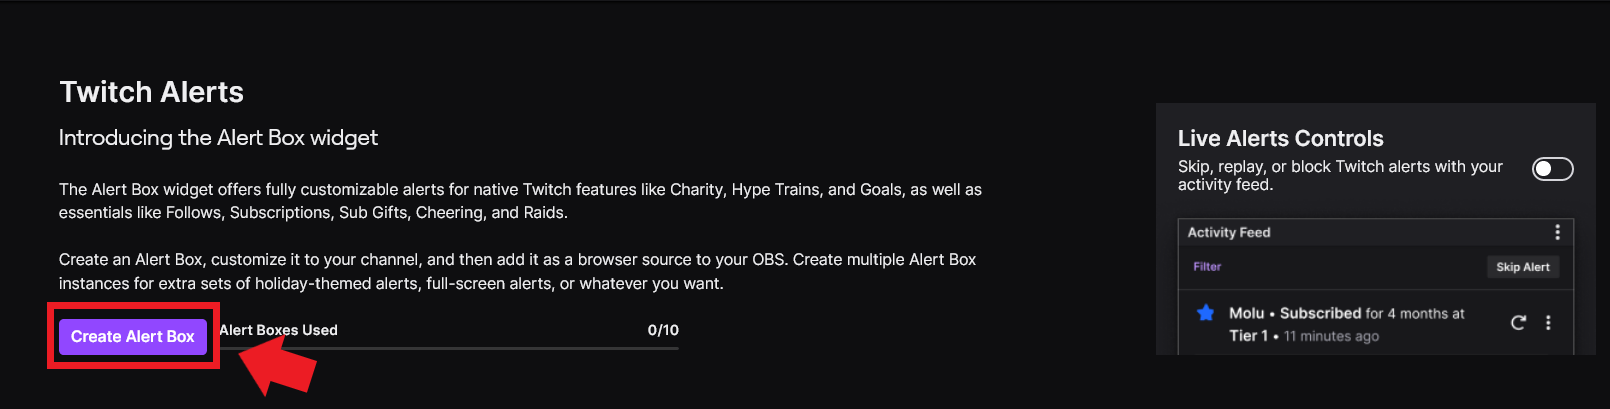
This will take you to your alert box widget. Click Create Alert Box. You can create up to 10 different Alert Boxes, with their own custom overlays and widget URL.
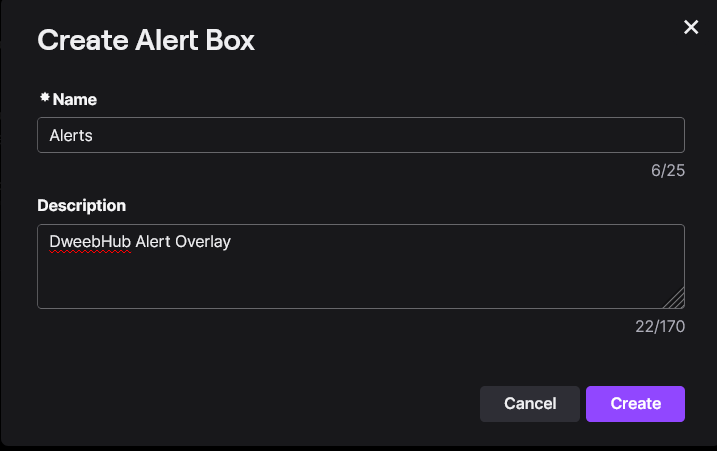
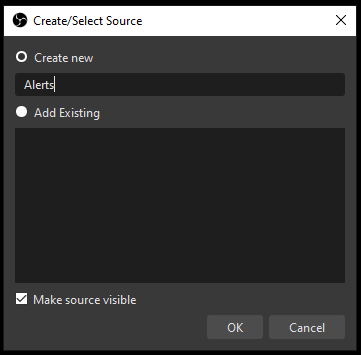
Then lets give the Alert Box a name and description, then Click Create. As you can tell, we made ours very creative.
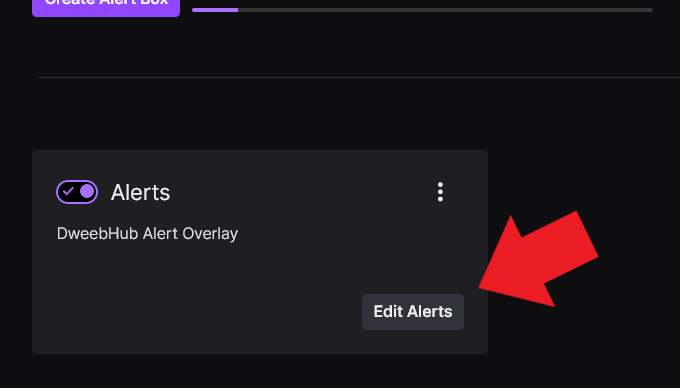
Then you’ll see the box pictured below, click on Edit Alerts.
Now you’ve just crated your very first custom overlay using Alerts by Twitch. Inside the Alert Box Overlay, on the left hand side you’ll see what Twitch call’s Alert “Variants”.
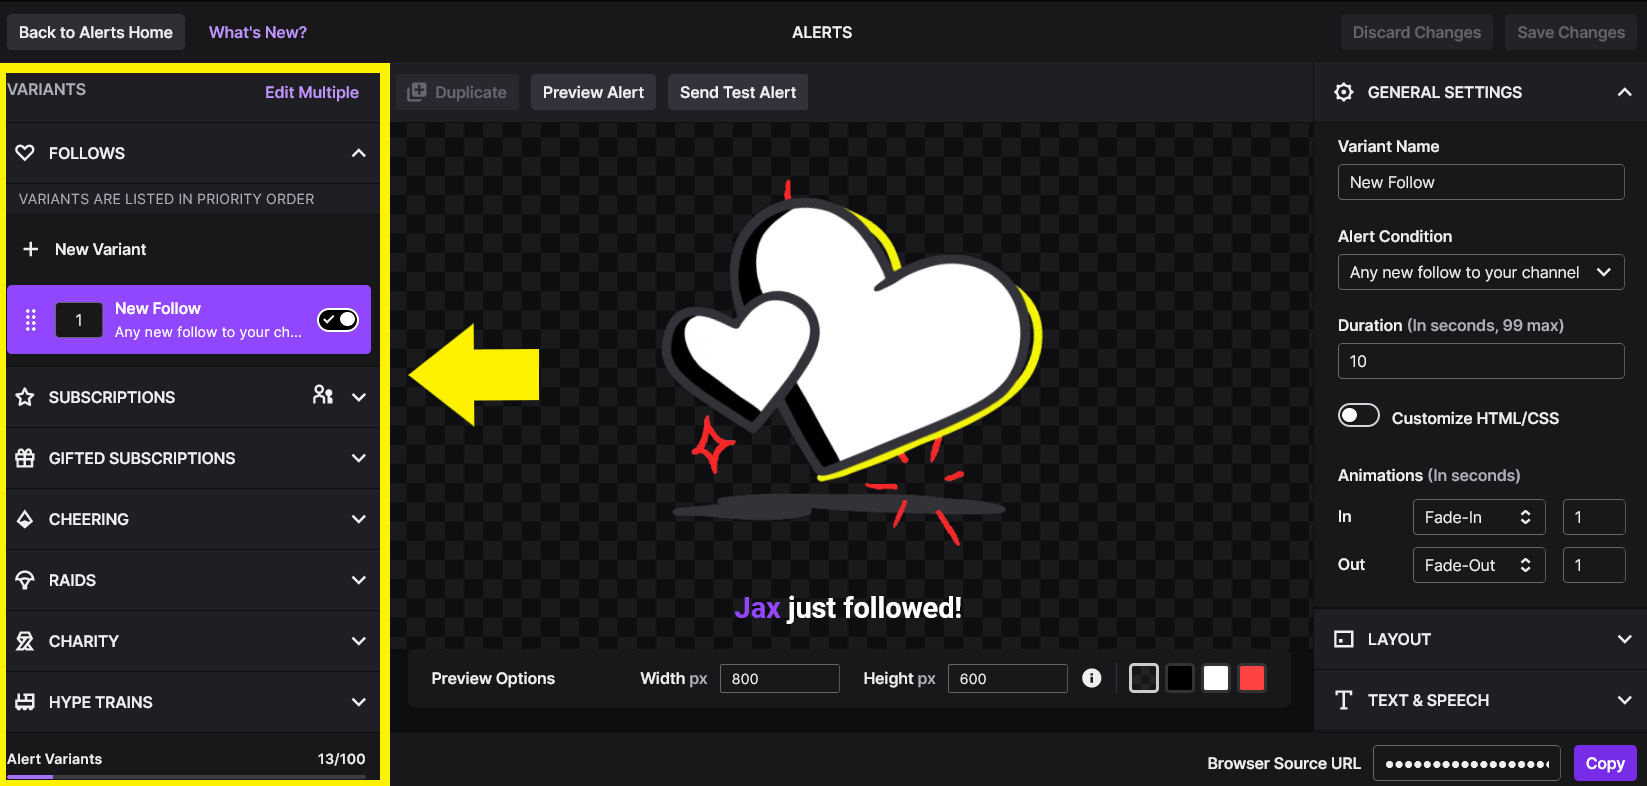
You can enable or disable all of the different types of Twitch Alerts listed by checking the slider, everything from follow alerts to hype train alerts.
Additionally you can create Variants for each type of alert overlay, making special notifications with specific criteria. Like setting alerts to only trigger when a certain amount of gift subs are given, or setting the raid alert to trigger only if its 5 viewers or above. There is a lot to play with in there to make your Twitch stream stand out!
(IMPORTANT NOTE: Anytime you make any changes to alerts, like adding or subtracting the types of alerts you wish to display on stream. You MUST copy the Browser Source’s new URL since it updates when these changes are made. You’ll have to go back into OBS and re-paste the new URL into your Browser Source Settings.)
Adding an Alert Image
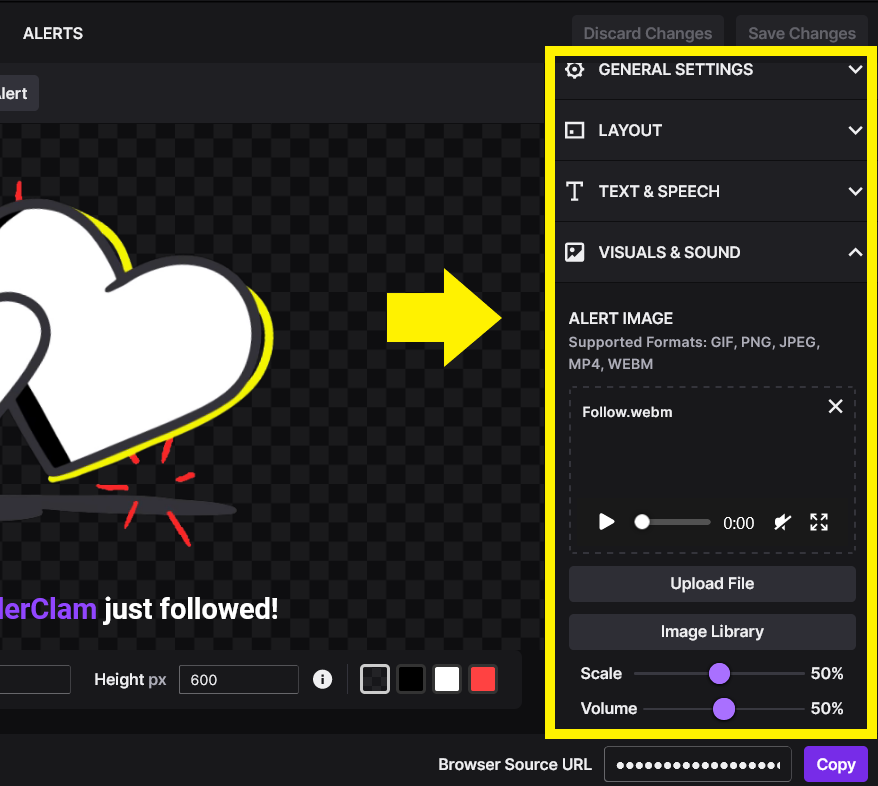
On the right hand side of the Alert Box Overlay, here is where you can create custom alerts. You can adjust and change the layout of the alert, upload any custom GIF or audio file, and even add text to speech as well!
If you’ve used any 3rd party websites like Streamlabs or Stream Elements, this should look really familiar.
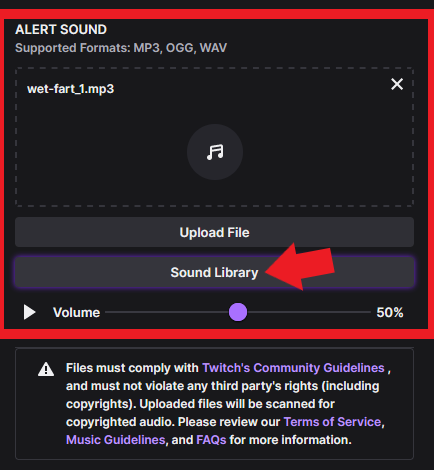
Adding an Alert Sound
Next lets add our sound effect for your custom alert. Below to Alert Image section, you’ll see Alert Sound.
Here you can either upload your own custom audio file or use an existing one from the Twitch Sound Library.
In the Asset Library you can view all preloaded sound effects and the custom sound effects you’ve uploaded that you can use on your own alerts.
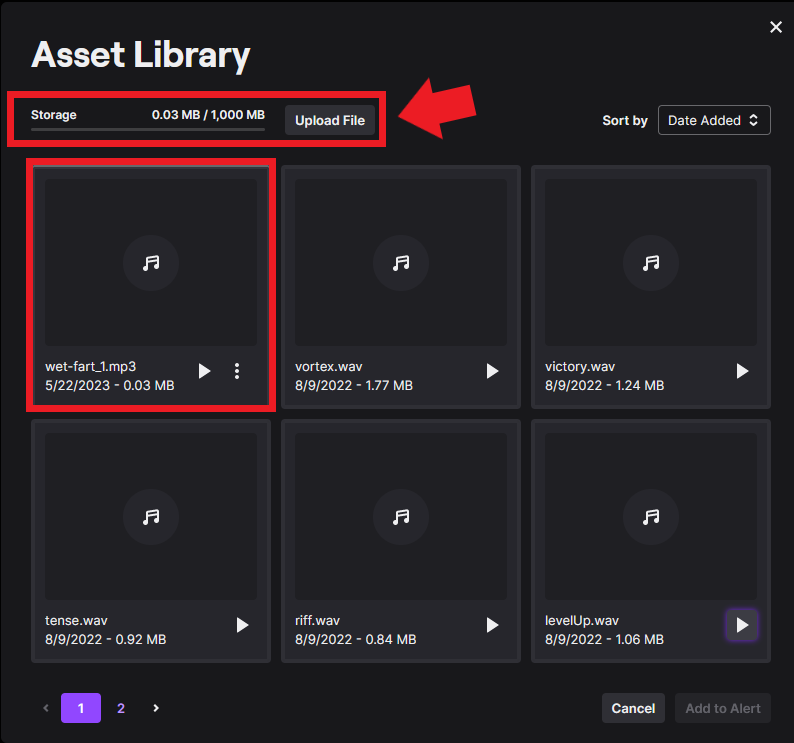
Twitch allows you to store up to 1,000MB (1GB) of audio files, you can delete any custom uploaded sounds by clicking the 3 dots on the bottom left of the square.
How to Add the Custom Twitch Alert to OBS Studio
Now that we’ve selected our Alert Image and sound, lets Copy the Browser Source’s unique URL at the bottom left of the Alert Box Overlay screen.
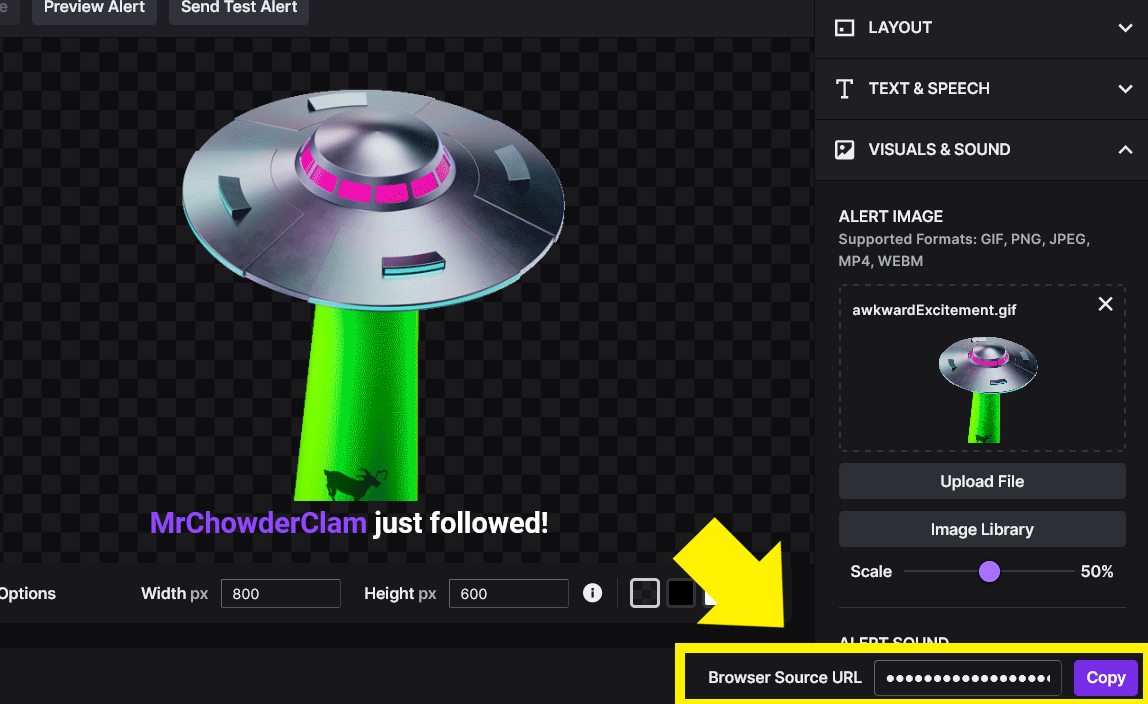
(SAFETY FIRST: Do not share your Browser Source URL with anyone!)
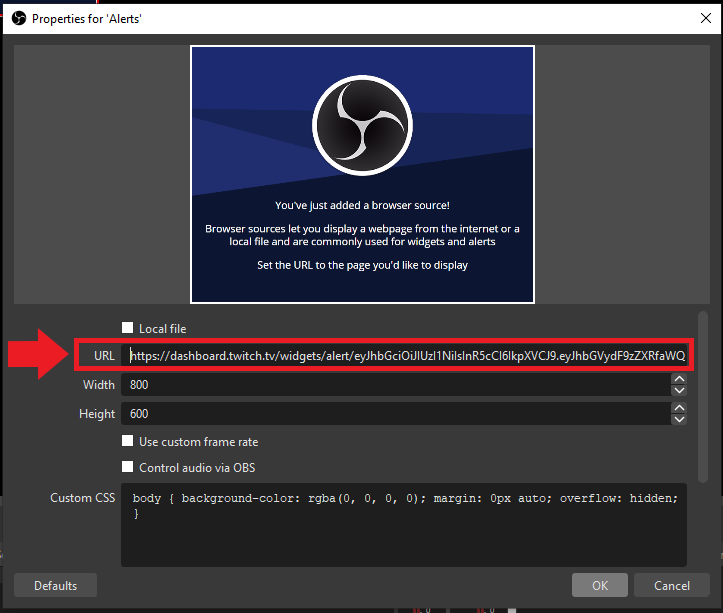
Next step takes place in OBS Studio, select the scene(s) you wish to have alerts show on stream. To add a new source Right click in your sources, then select Browser.
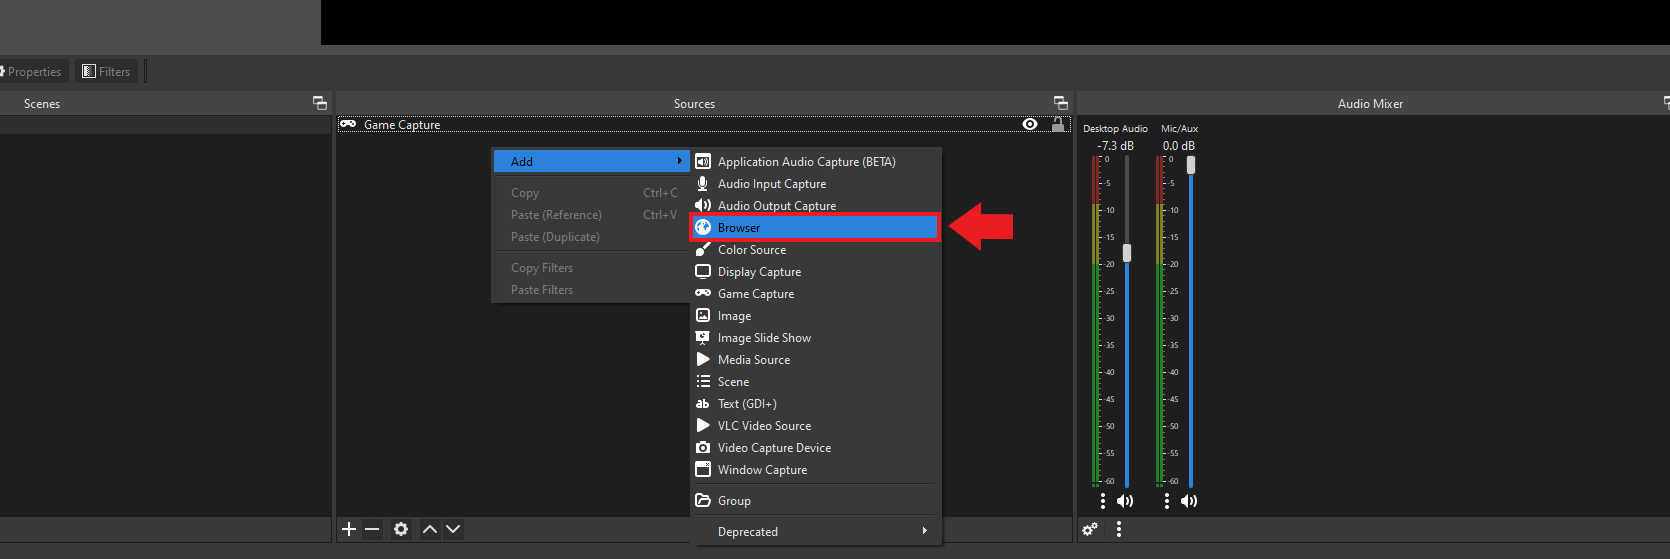
Lets give this source a name, again DweebHub opting for an extremely creative name.
Paste the Browser source link you copied into the URL field and click OK.
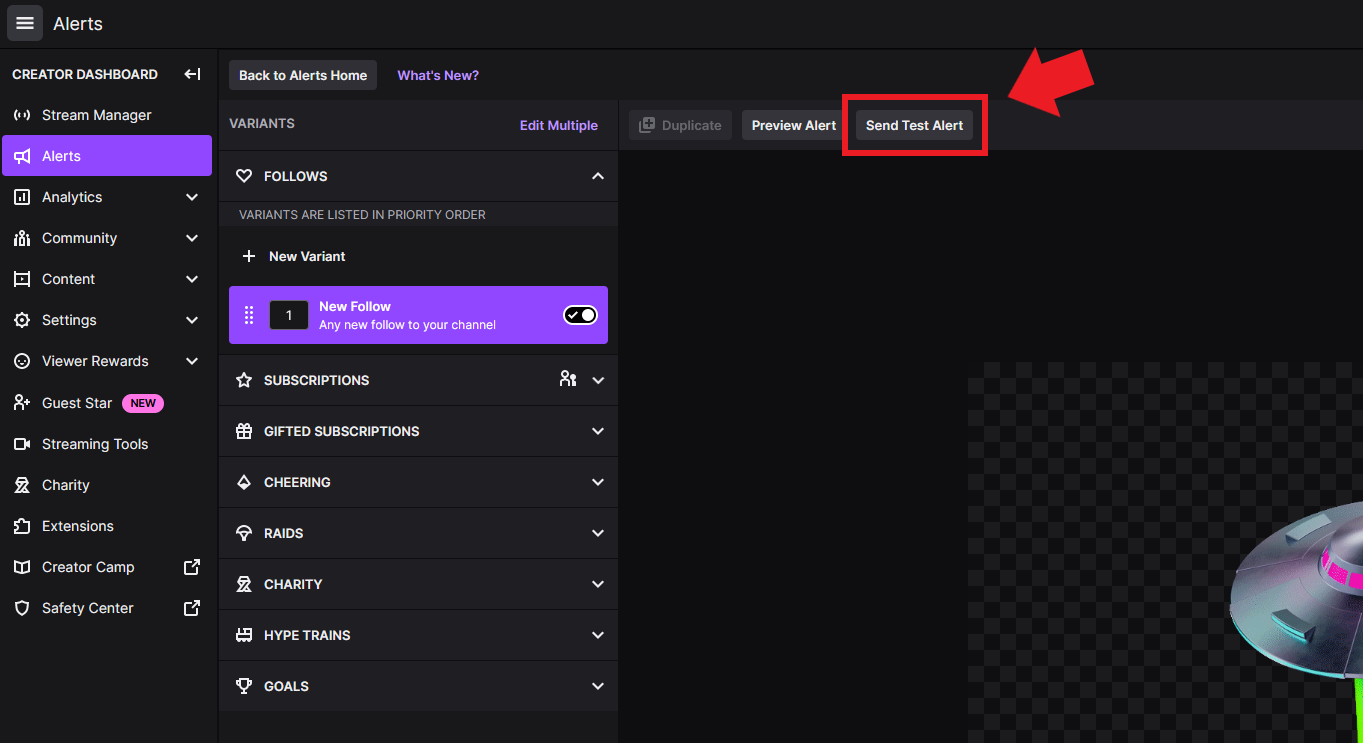
Now lets go back to our Twitch Alerts Overlay and test out our new alert alert. Click Send Test Alerts.
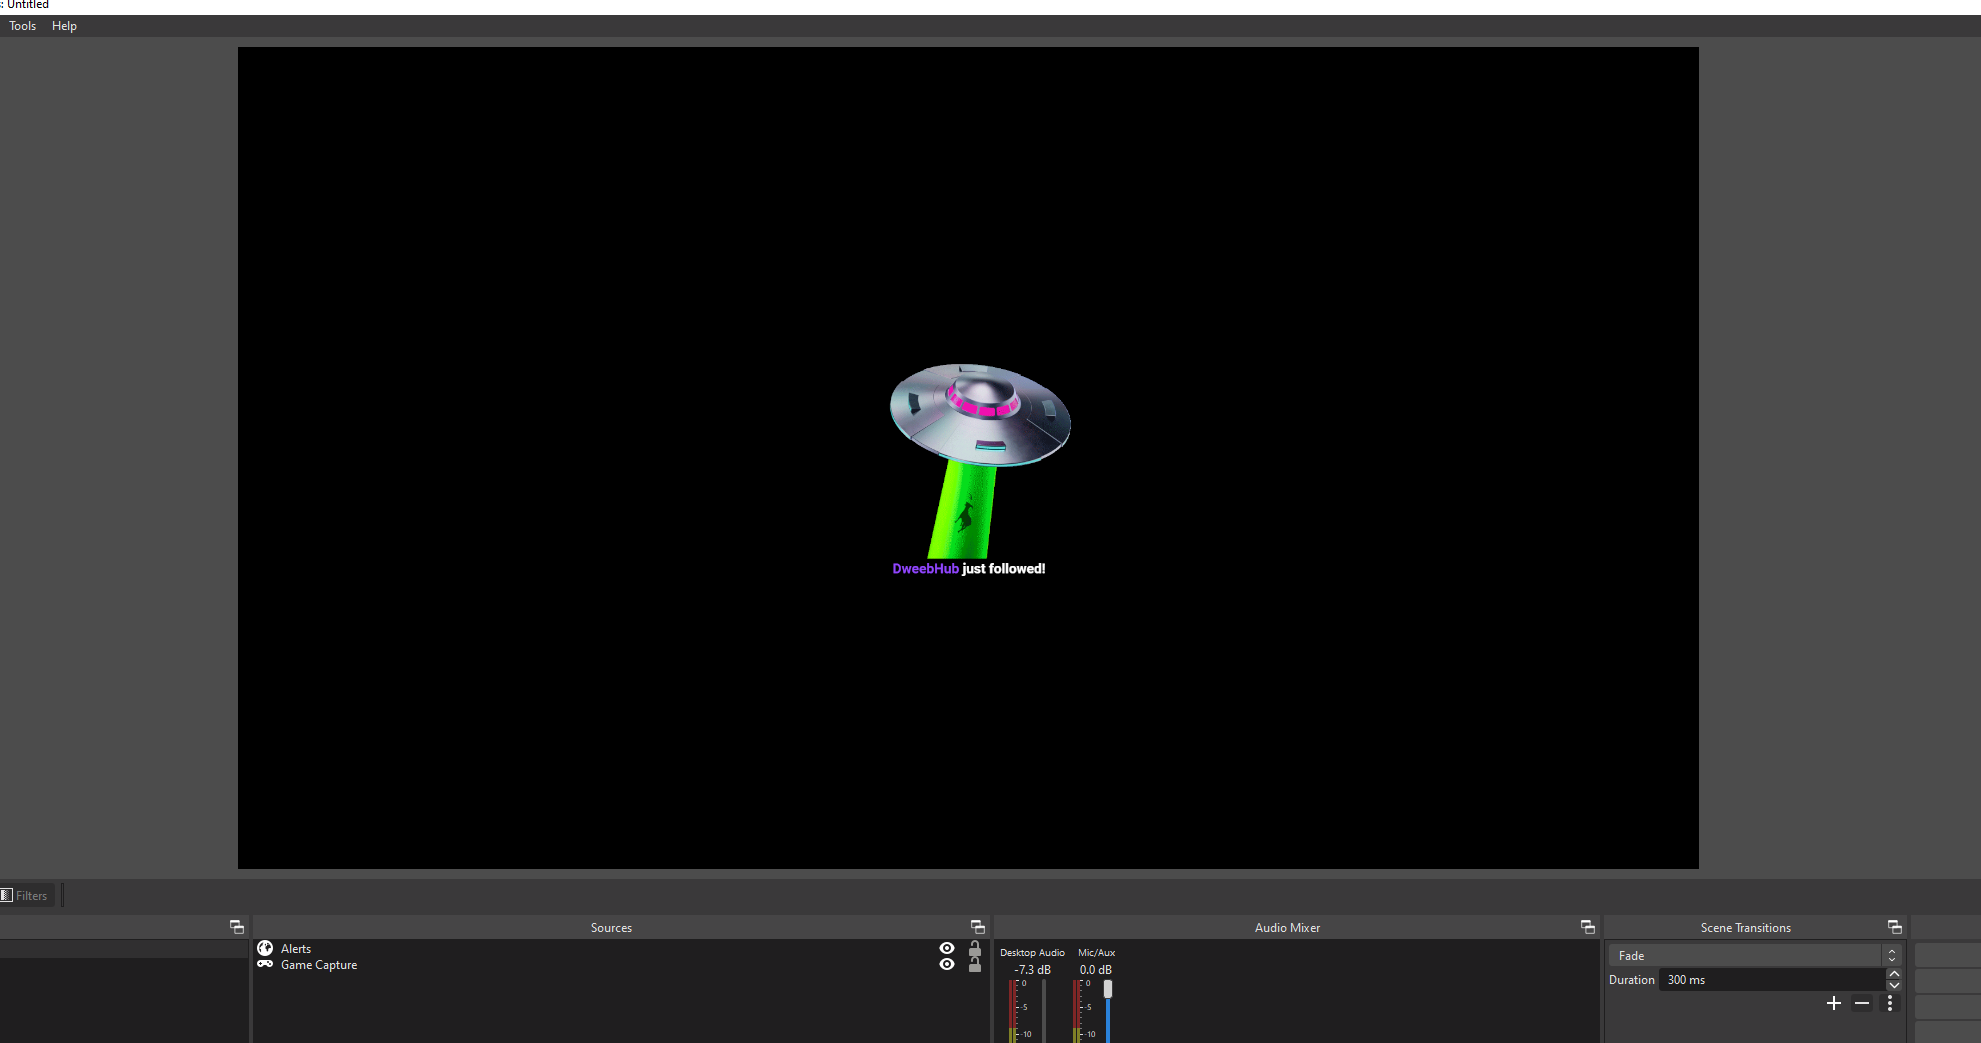
Now reposition your alerts where you would like them to display while live streaming and the test alert should display in the preview window.
How to Setup Alerts Using Twitch Extensions
Another great way to setup Twitch Alerts is by using the OWN3D – free stream alerts extension. Rated 5/5 for over 3,000 users, the OWN3D extension allows streamers a direct way to add stream alerts directly through their extension.
Again, lets head over to our Creator Dashboard. Click on Extensions.

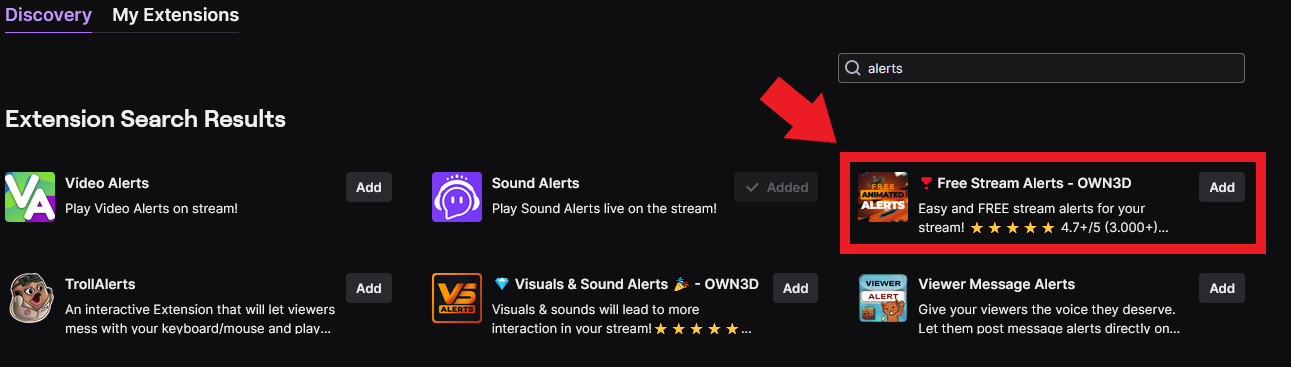
Then enter in “Alerts” in the search bar and select the OWN3D – free stream alerts extension by clicking Add.
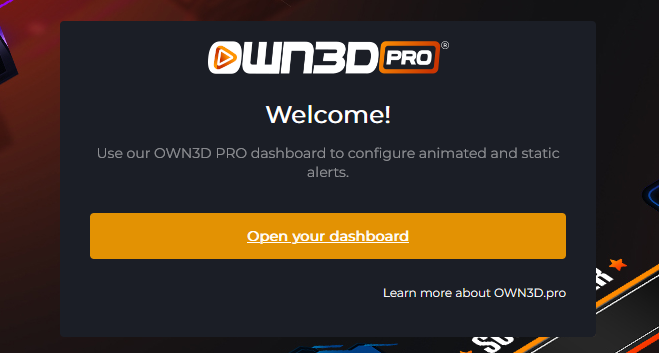
Then open your OWN3D Dashboard and sign in using your Twitch account.
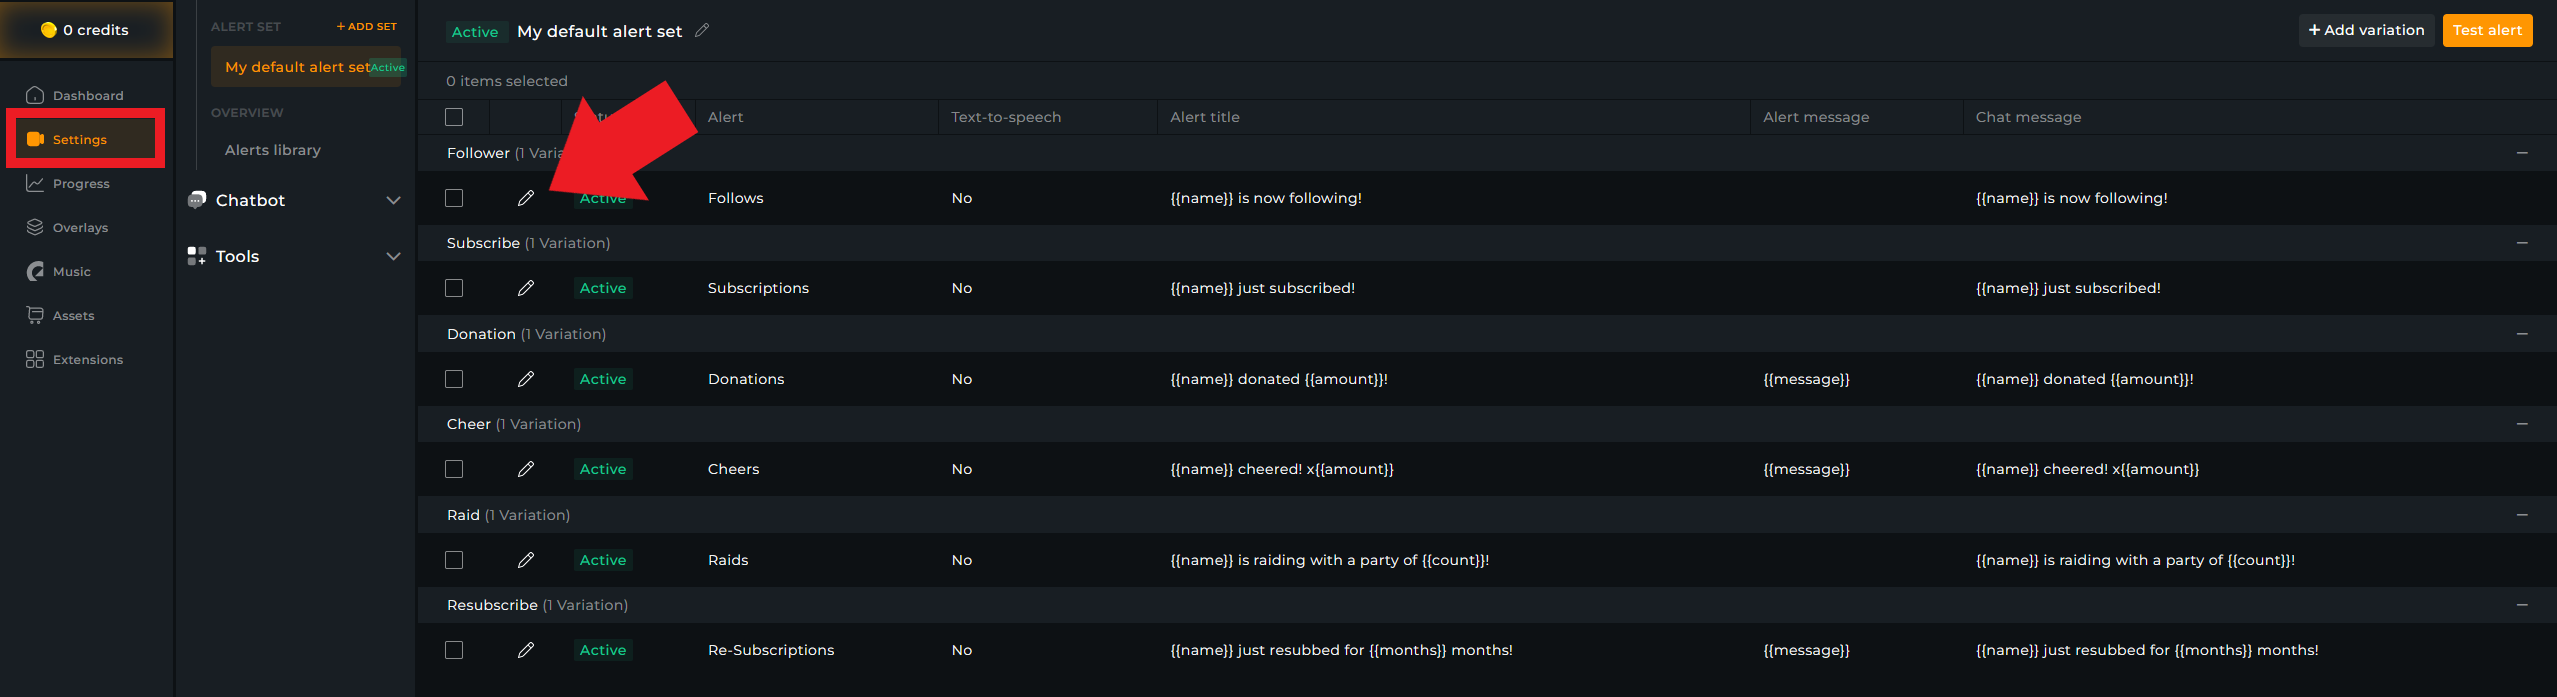
Your browser should open and up and redirect you right into your OWN3D Alerts Settings.
Lets setup a simple follower alert as an example, click the Edit Pencil.
From this menu, you can change or customize the alert to your choosing. From the text displayed on the alert to the sound played. We’re going to focus on just changing the alert style and alert sound.
Under Alert Style, select Choose Style.

Here you can select an asset from either the OWN3D library or upload your own. Lets select something from the OWN3D Pro Library.

Once you’ve selected your follower alert package, either upload a custom sound or select from the OWN3D free sounds of the day section. (They do have a premium selection in partnership with Epidemic sound, you’ll have to minimize that to see the free sounds).

Now that you have both your alert and sound effect selected, click Save and Publish at the top left.

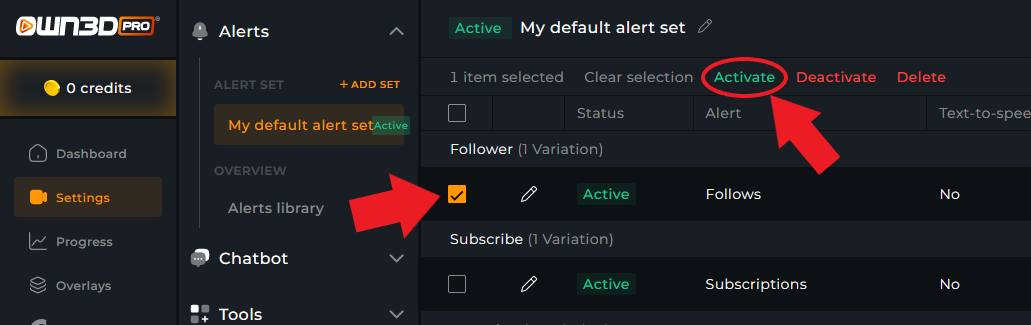
Then select the alerts you want to make active by checking the box to the left of the alert, then click Activate.
Now alerts will show on an overlay on your next stream! Since this extension doesn’t use any sort of browser source settings, you’ll have to actually be live to test the alert. OWN3D also has some great looking alert packages and pre-made alerts, both paid and free that are worth checking out. They also have alert packages for other streaming platforms like YouTube gaming and Facebook gaming.
Why are Alerts Important?
Stream alerts are a way to make a big deal out of viewers interacting with your channel. Even individual alerts like a follow or a subscription, acknowledging any form of engagement makes viewers feel like they’re contributing to the channel and its community in an important way. If you’ve ever gifted subs or tipped on any stream, imagine that channel not having any type of alerts or if they never said any sort of thanks. Remember, these viewers are taking time out of their day to watch your Twitch channel instead of the millions of other channels out there. So always make sure to thank them in any way possible!
Other Next Level Alert Idea’s
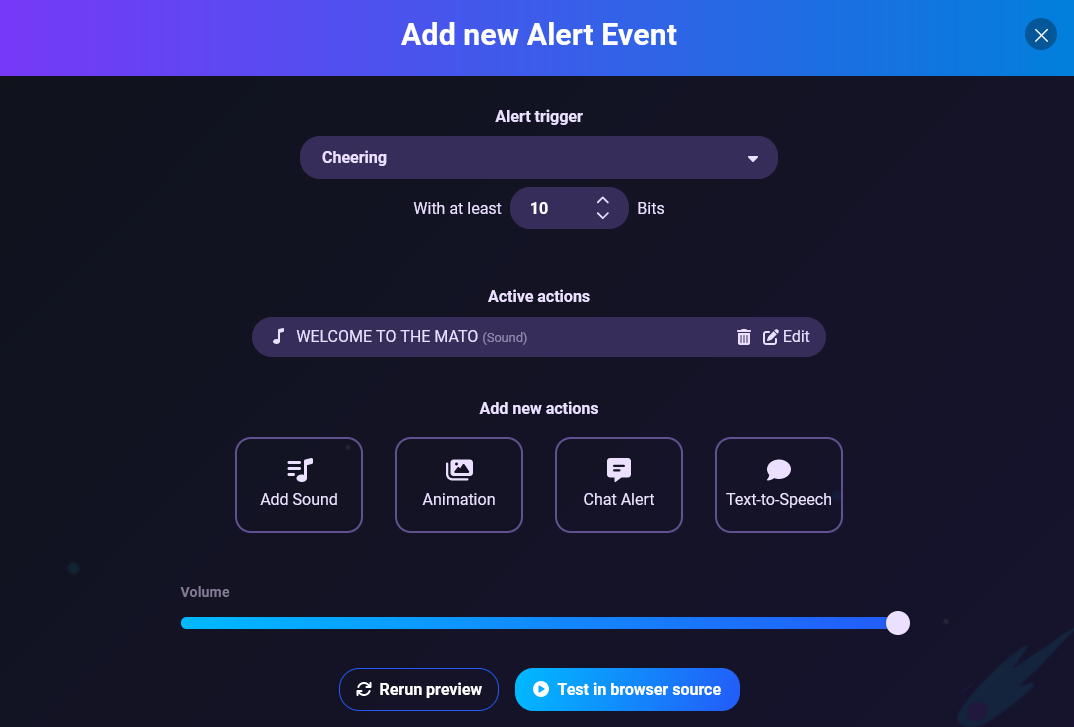
Since you can setup Twitch alerts to activate on specific events, like only having alerts for a certain amount of gift subs or bits, you can use that to your advantage to make your stream stand out! Below we give you some fun idea’s to use in tandem with alerts, to make viewers feel special and want to participate more. These will take any simple stream and give it enough extra flavor to keep viewers entertained and build hype around the next cheer or donation.
- Specific Sound Effects – Setup sound effects to trigger once a certain criteria is met. Example, using the Sound Alerts Twitch Extension you can set a specific OBS alerts and sound effects to play once a viewer cheers 10 Bits.
- Scene Change in OBS – Using a chat bot like Firebot, you can setup of scene changes once a user donates, cheers, or subs. Shown below is an example where we are setting up a scene change to activate once a user cheers 10 bits. The scene will go to a scene where an OBS filter is setup, making the streamer’s webcam look distorted or a short period of time.

- Use Unique Alerts for Different Event’s -Instead of using the same old standard alert for every event, take the time to setup unique alerts for every situation. It can make a huge difference in building hype around a raid alert, cheer or anything that will generate a hype train. Keep those users engaged!
Conclusion
Well we hope this guide helped you learn how to add Twitch alerts to OBS using both the new Alerts by Twitch feature and the OWN3D Twitch extension. Creating fun and unique alerts are a simple way to keep viewers focused, get them excited and make your live streams something worth sharing with others.
Amazon and the Amazon logo are trademarks of Amazon.com, Inc, or its affiliates.