As an Amazon Associate I earn from qualifying purchases.
Taking that first brave step into the world of live streaming on Twitch is exciting! Streaming can open up so many doors from finding new friends online, or even turning playing video games into a career. But there is one problem, where the heck do you get started? Well in this guide we’ll show you how to setup OBS for your first Twitch stream!
What You Need to Stream
For Single PC Streaming
- Gaming PC
- We recommend a build with a relatively newer 4-6 core processor and graphics card (GTX 1080 or newer)
- OBS – Open Broadcaster Software
- A Twitch Account
- High Speed Internet – 6 mbps upload speed (for 720p60fps)
For Streaming Console Gameplay
- Gaming/Encoding PC
- If PC doesn’t have a dedicated GPU, must have an integrated GPU (Like a Ryzen 7 5700G)
- External Capture Card
- OBS – Open Broadcaster Software
- A Twitch Account
- High Speed Internet – 6 mbps upload speed (for 720p60fps)
OBS Installation & Initial Setup
First, you’ll need a program called Open Broadcaster Software, OBS Studio for short. OBS is the worlds most widely used FREE streaming software. You can download OBS Studio from their official website. Click your operating system and the download will start automatically.

Download screen from obsproject.com. Don’t forget to contribute to Jim and the team! Allows them to keep this amazing program completely free.
Next, go through the OBS Studio Installer.
Before you open OBS, lets make sure OBS is being ran in Administrator mode.
Right click your OBS exe. icon, go to Properties.
Under the compatibility tab, you’ll want to check the “Run this program as an administrator” box and hit apply.

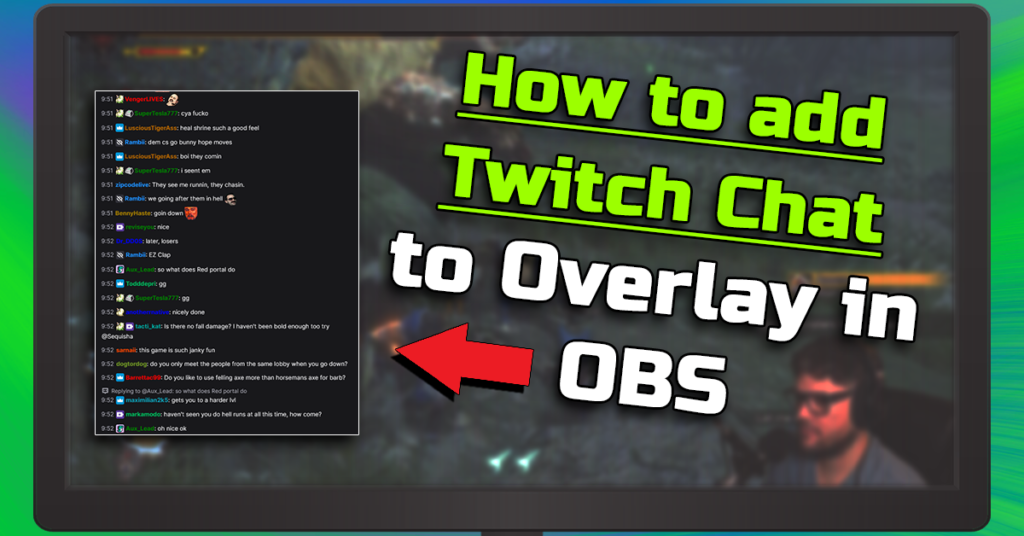
New to OBS? Want your chat to show on stream?
Check out this guide on How to Add a Twitch Chat Overlay on Screen in OBS
How to Add Your Stream Key to OBS
What is a Stream Key?
The stream key is exactly what it sounds like, a unique identifier that allows your stream into Twitch’s ingest servers. It is a required step and by all means, YOU SHOULD NEVER share the stream key with anyone.
How to find your Twitch Stream Key
First, go to the top left of your Twitch homepage and click your profile picture. (Hopefully looks better than mine!)

Then select Creator Dashboard.

Next, click the settings option to open up the drop down.

Out of the settings options, select Stream.

At the top of the stream settings, you’ll see your stream key. Copy that using the copy button.
Now open OBS Studio. Go to Settings.
Under the Stream options, click the Use Stream Key button.

Paste the Stream Key we copied from Twitch in the empty Stream Key box in OBS.
Now that we have our Stream Key entered, next click the Connect Account Button to link out Twitch Account to OBS.

A box will appear asking for your Twitch login, enter your username and password. Sign in and give OBS authorization to access your Twitch account.
Now OBS and Twitch are fully integrated. Now lets get our first Scene setup!
How to Setup Scene’s in OBS
Scene’s in OBS are where you setup your stream layout and is what will be visible to your Twitch viewers once you hit “start streaming”. Inside a scene you can setup individual sources like a webcam, gameplay, or alerts/effects!
Below we’ll show you how to setup your first scene in OBS, explaining the basics and getting you up and running to your first official stream.
Setting Up Your First Scene – Gameplay
In the bottom left of OBS, find the box that says “Scene“.Next to Scene box, you’ll see the “Sources” box. This is where you place sources like your gameplay, webcam or any of the many options OBS offers.

In the Sources box, as the text says, you can right click anywhere inside that box or click the plus button at the bottom.
 If right clicking, just hover over the Add button to open the source options.
In the source options, lets go ahead and get our game capture setup. This way OBS will hook any full screen game and display it in the preview window. Select Game Capture. If needed, you can enter a name for this source.

- Next the Game capture Properties window will pop up. In the Mode dropdown, you can select from the following:

- Capture any fullscreen application – Exactly as it sounds, if you are running any game it MUST be set to fullscreen in the video/graphic settings. This is the preferred option.
- Capture specific window – Some games don’t play well with when OBS attempts to capture fullscreen gameplay, capturing the game using this feature can sometimes be a better option. Or if you run your games in borderless windowed.
Then click OK.
Setting up a Webcam
Just like we did for the Game Capture, you’ll want to right click in the empty space in the sources box. Hover over Add. then select Video Capture Device.

Would suggest renaming this source as “webcam“. Then in the properties window, you’ll want to select:

- Resolution/Device Type – Set to Custom.
- Resolution – We recommend leaving this at 720P, higher resolution requires my resources and may impact gaming/streaming performance.
- FPS – Set to either 30 or 60. The higher the FPS, the more impact your stream will have on your PC.
- Video Format – Leave as “Any“.
Once done, click OK.
Place the webcam in the desired spot by simply clicking and dragging.

IMPORTANT SIDE NOTE** How you arrange your scene’s determines their visibility, if you place your webcam first it will always show on top of the gameplay. If you place sources above the webcam it will be hidden underneath your gameplay.
Correct
Incorrect

And with that, your first basic overlay is ready to for your first stream! Now lets get our audio set up
Setting up Audio Devices
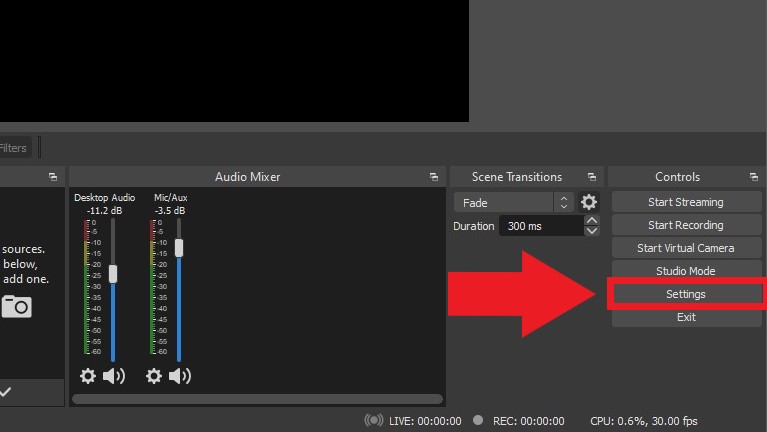
You can find all the active audio devices present in the Audio Mixer in OBS. Which is located by default, at the bottom middle of OBS.

How to Select Global Audio Devices in OBS
Again, lets go into Settings.
Under the Audio tab, you’ll see a list of options in Global Audio Devices. The audio devices selected here, will be present in ANY scene. Hence the term “global”.
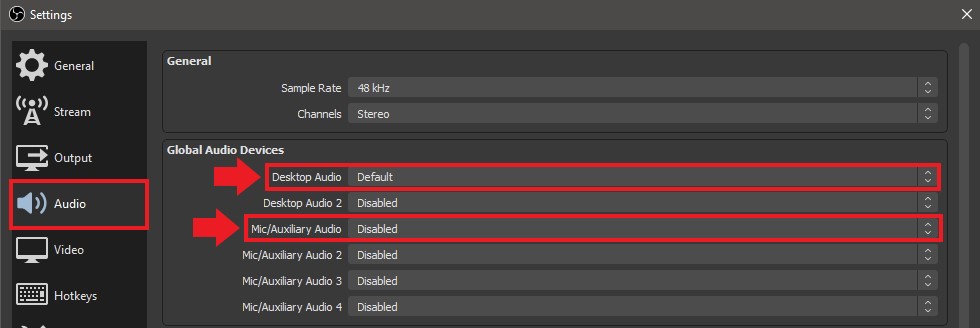
Desktop Audio – You can leave this at default. OBS will use your desktop audio, meaning it will capture any audio coming games, browsers, or any app that also shares the desktop as its main output device.
Mic/Auxiliary Audio – From the drop down, select your microphone you intend to use when streaming.
Audio Mixer Options
The audio mixer gives you plenty of cool options and tools to use at your disposal. Everything from adding effects and filters, to settings delays to audio sources.
In the audio mixer, click the cog wheel of the audio source you want to view options for.

- Lock Volume – Pretty self explanatory, selecting this locks the fader in place.
- Hide/Unhide all – Select these to either hide or unhide audio sources. When adding any USB Webcam it tends to make an audio source since most webcams have built in mic’s. Since you’ll never use that audio source, you can mute then hide the source.
- Rename – Would always suggest using this to assign names to each device, makes it easier to remember what they are.
- Vertical Layout – Gives you the option to change the audio mixer layout from vertical to horizontal.
- Filters – Add useful tools like a noise gate, compressor, limiters to each specific audio device.
- Properties – View the properties of that specific audio device. Some devices may provide additional options to play with.
- Advanced Audio Properties – This opens another window that has additional options. In this window you can add a delay to any source, assign multiple sources to their own tracks, enable monitoring and more!

Next we’ll be going over your video and output settings in OBS Studio. Which will determine the performance and quality of your stream.
Stream Quality and Video Settings
The video settings are what determine what resolution and frame rate you want to stream in. Higher resolutions tend to be a bit more demanding, requiring a fast internet upload speed (6,000 mbps or higher) and a strong PC. While lower resolutions (720p60fps) tend to be more favorable among viewers as it requires less bandwidth to watch your stream. Finding the sweet spot of what works best for you can take time, but thankfully OBS Studio gives you plenty of quality options to play around with!
OBS Studio – Auto-Configuration Wizard
First, which is arguably the easiest way to setup your stream quality and video settings is to use the OBS Studio Auto-Configuration Wizard. This will automatically scan your hardware and determine what quality range you should go for.
At the top of OBS, go to Tools.

Select “Optimize for streaming, recording is secondary“.
Next, choose the desired resolution and frame rate you want to stream in. (Most common used are 720P60FPS)

The next window will request you to connect your Twitch Account, if you haven’t already.
After entering your Twitch info and syncing your account info to OBS, you can choose the streaming service and run the auto-configuration by clicking next. Leave both boxes checked.

Let OBS run its configuration and bandwidth test.

Then you should have your optimal stream settings based on your PC’s hardware!
Please make note: While OBS may recommend streaming in 1080P 60 FPS, this may not be the optimal resolution for viewers. We suggest starting at 720P 60FPS to see if the PC can stream and not impact gaming performance. (Learned that the hard way, a lot of laggy streams!)

Now you should be able to stream without any hiccups after using the OBS-Studio Auto Configuration Wizard! Next we’ll show you how to manually setup your video and Streaming output settings.
Manual Setup up – Video & Stream Output Settings
Open OBS, go to Settings.
Go to the Video Settings.

- Base (Canvas) Resolution – Set to your monitors resolution, in this case we’ll stick with the most common which is 1920×1080.
- Output Resolution – This allows you to scale down the raw signal into the resolution you wish to stream in. We’ll set it to the most common resolution, 720p.
- Downscale Filter – When downscaling, you have to option to add a filter to improve the image quality. Set to Lanczos.
- Common FPS Value – Set to the desired frame rate you want your stream to be in. 60 FPS is the golden benchmark, but this can be impacted by either the strength of your PC or your internet upload speed.
Is your stream lagging?
Check out our other post about what causes stream lag and how to fix it!
Next lets setup our stream quality settings. Go to Settings, then Output. Then change the Output Mode from Simple to Advanced.

Should look like this:

x264 Stream Quality Settings
Below are the best x264 settings for OBS for any beginner. A good rule of thumb, is again, to start with 720P60FPS stream settings.
If the stream performs well, then by all means start bumping the quality settings higher and see what works best for your system.

For the Streaming Settings, below is a good entry level place to start:
- Audio Track: Leave at the selected default setting, which is 1. OBS allows you to split and assign different audio sources to individual tracks for recording or streaming. (If you want to learn how to split audio recordings in OBS, check out our guide!)
- Twitch VOD Track: This setting lets you control what audio sources are recorded on your Twitch VOD. If you intend to play copyrighted music, we suggest using this feature.
- Encoder: Select X264
- Rescale Output: Check the box, then from the drop down select 1280×720
Next we’ll setup the Encoder Settings. This will determine the quality of your stream, combining both the power of your PC and internet upload speed.
You can find Twitch’s suggested video bitrate and other settings directly from their FAQ page. The settings pictured above/listed below, are mirroring what Twitch suggests.
- Rate Control – Set to CBR
- Video Bitrate – Twitch suggests a 6000 Kbps bitrate.
- Use Custom Buffer Size – Leave box unchecked.
- Keyframe Interval – Set to 2
- CPU Usage Preset – Very Fast (Good preset to start at, anything more may/will impact your PC’s performance)
- Profile – Set to High
- Tune – Leave at (None)
- x264 Options – Leave blank
NVENC Stream Quality Settings
Nvidia’s NVENC has been a real game changer in the streaming world. Since its introduction in 2012, it offers high quality stream encoding while using very little resources. NVENC really is the best bang for you buck when you want a good looking stream, but may not have strong enough PC to use X264.
 Here are some good streaming settings to start with for NVENC:
- Audio Track: Once again, we’ll just leave everything on track 1.
- Twitch VOD Track: Don’t use this setting unless you’re trying to avoid a copyright strike. This option lets you choose which audio track is kept on the Twitch VOD.
- Encoder: Select NVIDIA NVENC H.264
- Rescale Output: Again, lets select 1280×720 from the drop down.
For the NVENC Encoder settings, you can max out the quality fairly easy with minimal impact to GPU load.

Once again, always good to refer to Twitch’s encoding settings as a rule of thumb!
- Rate Control – Set to CBR
- Video Bitrate – Twitch suggests a 6000 Kbps bitrate.
- Keyframe Interval – Set to 2
- Preset – P6: Slower (This is the highest quality preset that will yield the best results)
- Tuning – High Quality
- Multipass Mode – Single pass (Selecting quarter or full resolution will only put additional strain on GPU, for little to no quality gain)
- Profile – Set to High
- Look Ahead – Leave unchecked
- Psycho Visual Tuning – Depends on the type of game you are streaming. Meant to improve quality for high motion games, at the cost of additional GPU load.
- GPU – Leave at 0. (Allows you to select the GPU you want to encode with, unless you are using SLI go ahead and leave at 0)
- Max B-Frames – Leave this set at 2. (Turning up B frames to 4 might improve stream quality for low motion games. But overall B frames assist video compression over lower bitrates.)
What is the difference between NVENC and x264?
NVENC and X264 are the most widely used encoders in the industry, regardless if you stream on Facebook gaming, YouTube, or Twitch. Its up for heavy debate on which encoder is better, but that really comes down to your PC’s specs and the types of games you play. As both could have a dramatic effect on how good your stream looks.
NVENC – This encoder is a physical chip that exists on any NVIDIA GPU (600 series+). Aimed at providing better encoding that x264 and leaving more room for CPU utilization.
In our experience, NVENC is a great encoder for pushing out high-quality streams. Especially with the newer RTX 2000 & 3000 series cards. Great for single PC streaming where you want to game at the highest performance possible while having a clean and lag free stream.
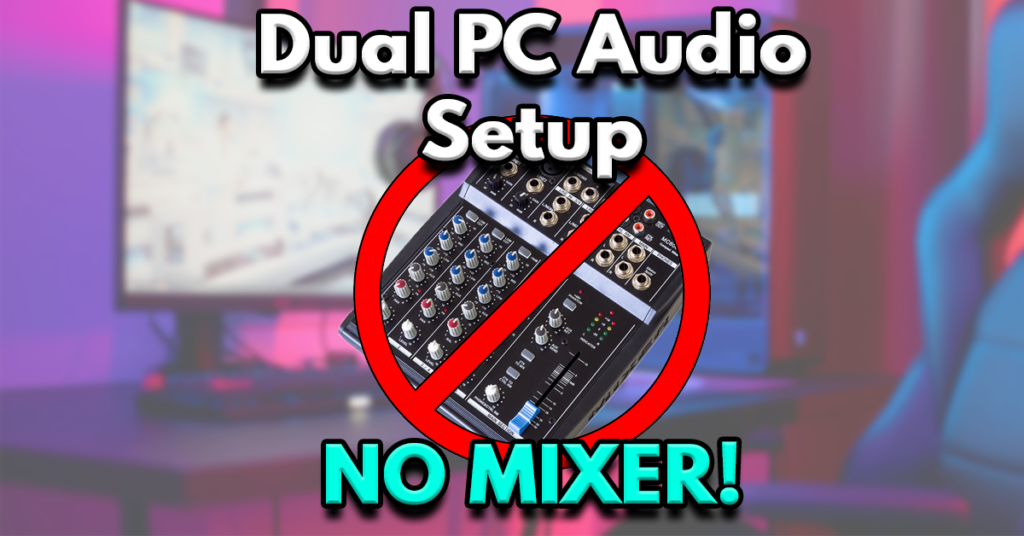
If you play competitive FPS shooters, you may run into frame rate or dropped frame issues using NVENC. Since the GPU will attempt to push as many frames out as possible, might not leave enough wiggle room for the GPU to render the video for the stream. (Learned that the hard way, which led to using a dual PC stream)
X264 – Uses your CPU as the primary software encoders and has a wide range of quality options. Any single stream PC with a CPU with 6 cores or under might struggle to hit 720p60FPS consistently, depending on the game you are playing.
If the games you play are CPU heavy, we would not suggest using x264 and to use NVENC instead. But overall, we’ve found x264 to deliver higher quality streams and recordings as long as you have enough CPU cores to spare.
Now that you have your first scene and webcam setup, hit that start streaming button to get on that grind! Streaming is extremely rewarding, from the friendships you’ll make to the experiences that will come. Overall, just remember to have fun and be yourself!
Amazon and the Amazon logo are trademarks of Amazon.com, Inc, or its affiliates.