As an Amazon Associate I earn from qualifying purchases.
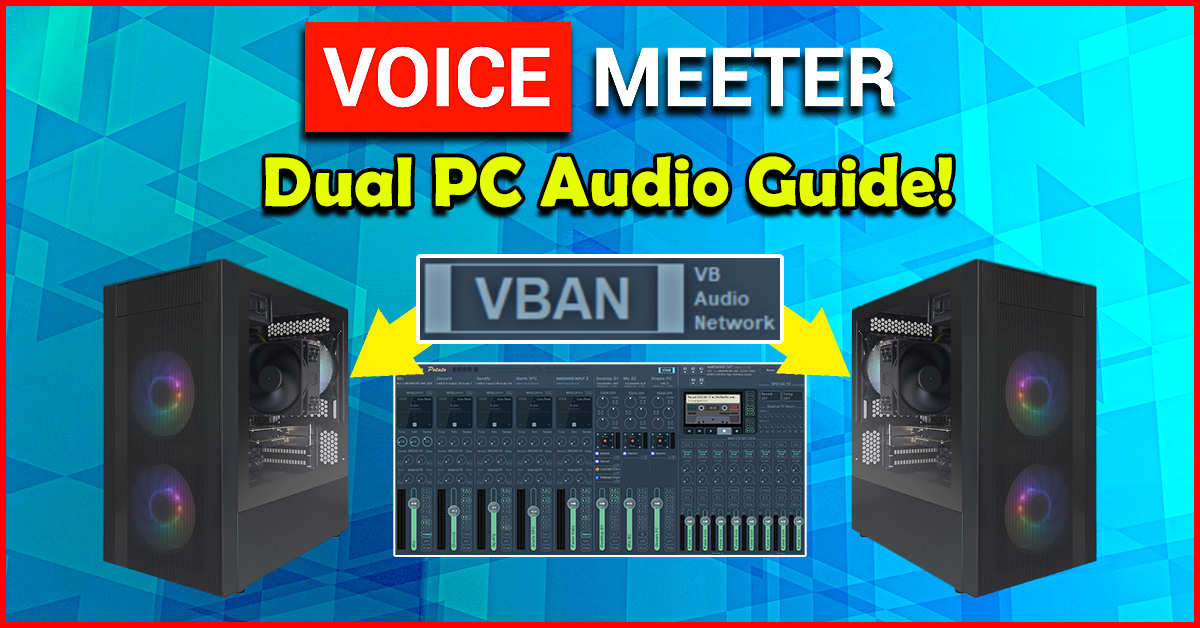
If you’ve found your way here, chances are you’re looking at how to use VoiceMeeter for your Dual PC audio setup. In this step by step guide, we’ll show you how to use VoiceMeeter’s powerful VBAN program that’s built right into the mixer. VBAN will allow you to connect audio streams between your streaming and gaming PC’s.
Table of contents
Setting up Dual PC audio using VoiceMeeter
Software Required
If you haven’t already, lets go ahead and install VoiceMeeter Potato. Links for everything needed for this VoiceMeeter Dual PC audio guide are below, follow the installation instructions and reboot the PC’s.
INSTALL THE PROGRAMS BELOW ON BOTH THE STREAMING AND GAMING PC.
VoiceMeeter Potato
The mixer software itself. Program itself is free/donation ware, to purchase a full license is under $10 which is way cheaper than a formal “streaming mixer”.
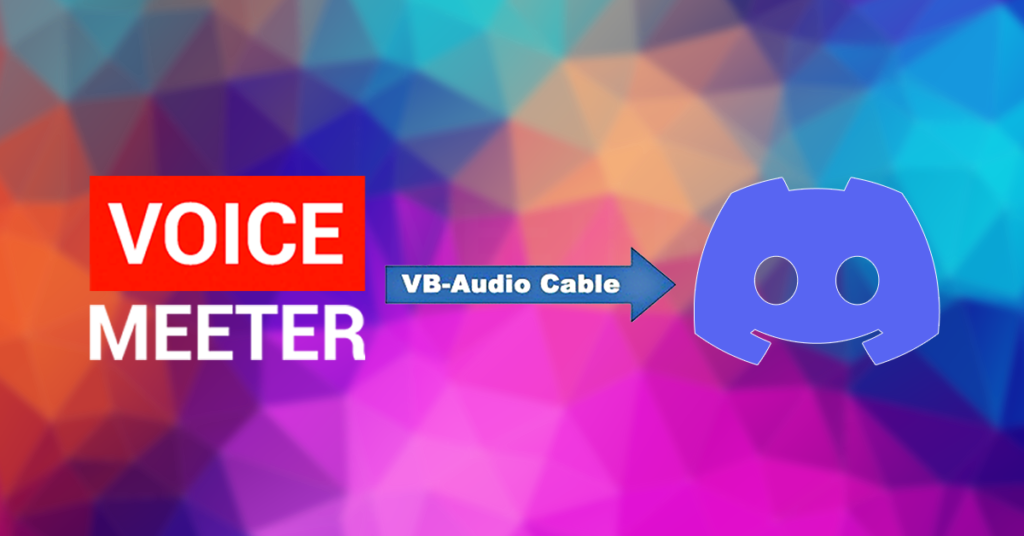
VB Audio Cable
A digital audio cable. Allows you to connect programs like Discord into the mixer. First cable is free, additional will cost extra.
Windows Audio settings – Both Gaming & Streaming PC
After installing both VoiceMeeter Potato and the VB Audio Cable, reboot the PC. We’re going to get our Windows Audio settings setup, assigning VoiceMeeter as our default input and output devices. THIS MUST TO BE DONE ON BOTH THE GAMING AND STREAMING PC!
First we’re going to open our sound control panel:

To make things a little easier, we’re going to rename the VoiceMeeter input and aux output audio devices. This will make identifying inputs a ton easier, especially if you are new to VoiceMeeter.
Under the “RECORDING” tab, find and right click “VoiceMeeter Aux Output” and click “PROPERTIES“.

Under the general tab, simply add the word “MIC” to the end of the devices name. Click apply.
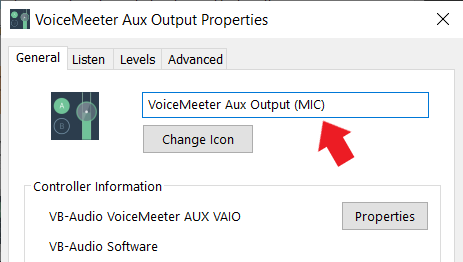
IMPORTANT NOTE: VOICEMEETER AUX OUTPUT is what you’ll need to select for any program you need to use your microphone on. (Discord, Skype, or any game requiring voice chat)
Now to the “PLAYBACK ” tab, right click the “VOICEMEETER INPUT” device and go to “PROPERTIES“.

Then add the word “DESKTOP” to the end of the playback devices name. Click apply and you are done with this step!

Now double check the because Window’s cannot be trusted. Check your Windows default Input/Output audio settings, should look like below:

Setting up the Mixer – Gaming PC
Hardware Outs
First, we are going to focus on the “HARDWARE OUT” section in the top right corner of the mixer. You’ll see these boxes listed A1 through A5.
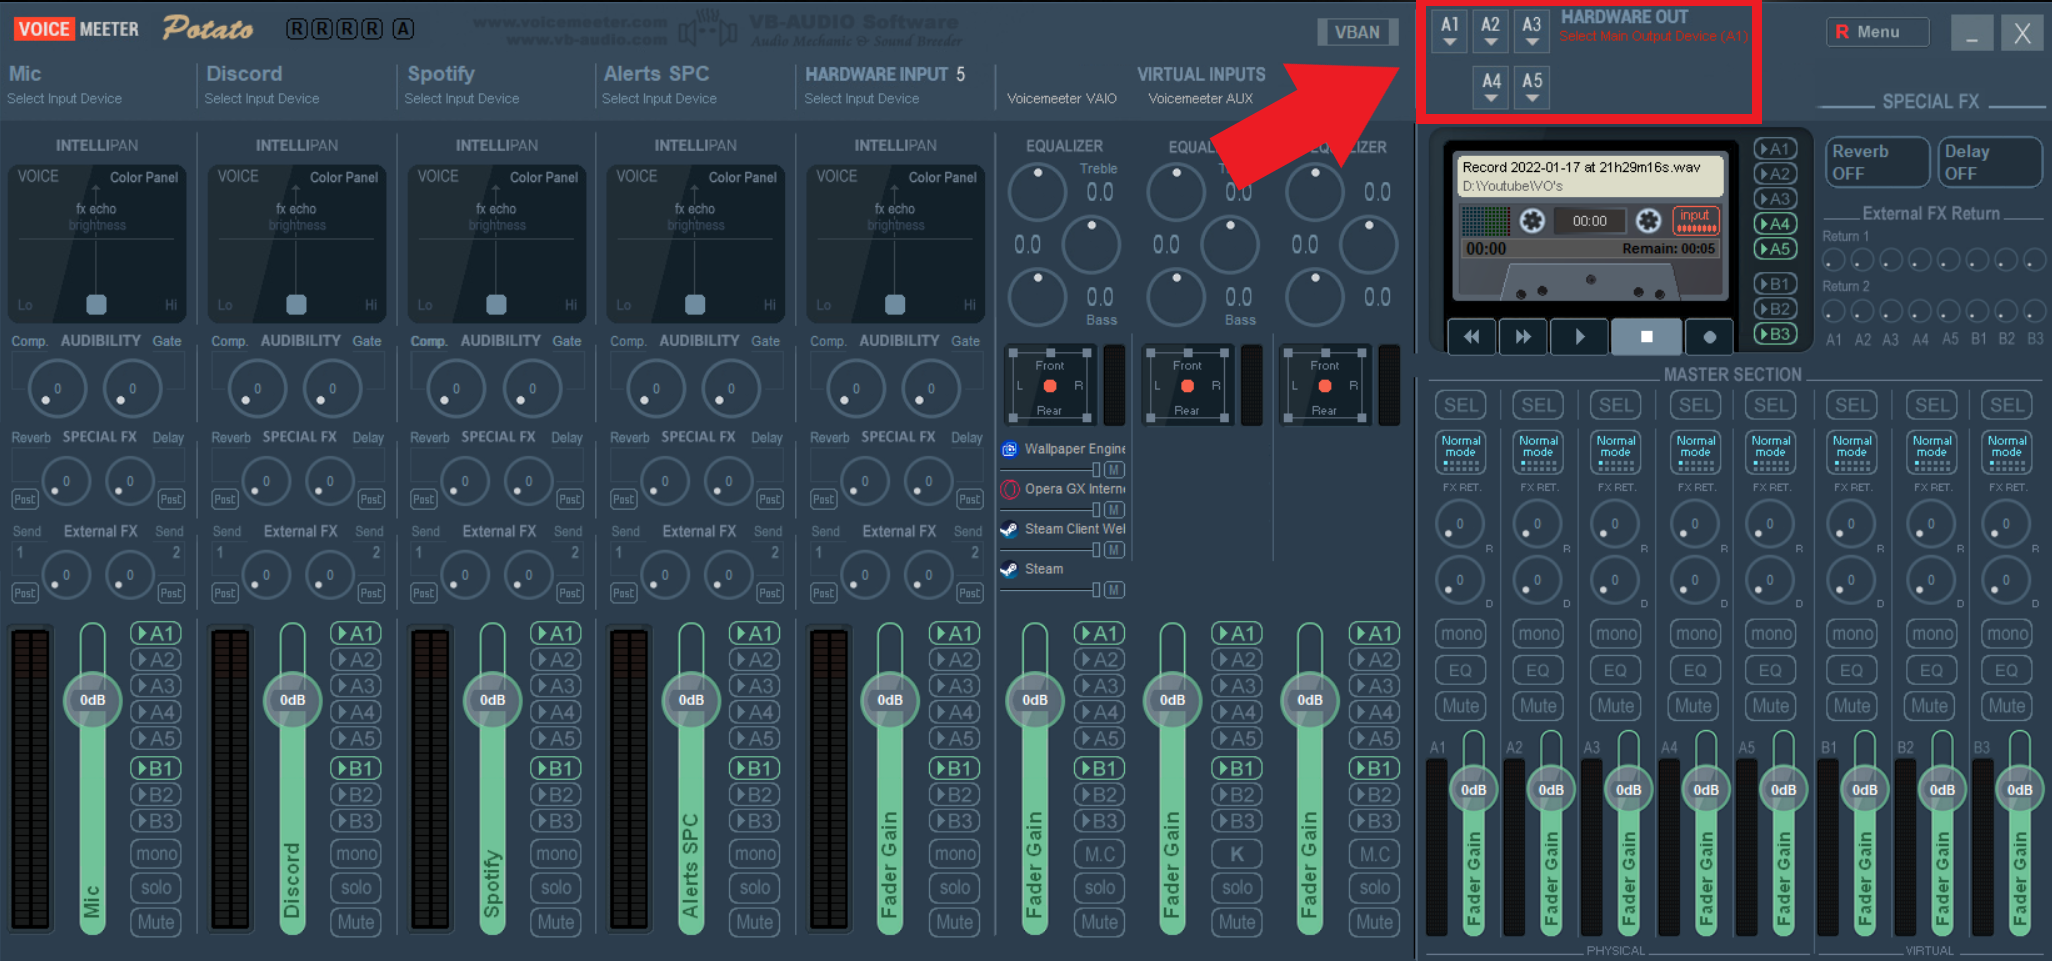
One of the cool features of VoiceMeeter Potato, is it allows you to split output audio signals. So if you wanted to have you final mix split between both a pair of headphones, and a set of desktop speakers, you totally can.

For the sake of this guide I’ll only be showing you how to setup your headphones, plus a capture card (just in case this applies to your setup).
In the A1 box, click and select your headphones, audio interface, or whatever your listening device is.

IMPORTANT NOTE: Would suggest choosing the “WDM” version of your output device, in my experience it’s had the least amount of latency.
Next, in the A2 box, select your capture card.

And that’s it! Now we have prepared both our headphones and capture card to receive audio from the mixer.
Virtual Inputs
Remember when we renamed our input & output options in our sound control panel? Here’s where you get to see why. Virtual Inputs are crucial to setup correctly to use VoiceMeeter for dual PC audio.
Shown below are the VIRTUAL INPUTS and is what would be considered as the “FINAL MIX”. These inputs are responsible for what is sent out to either to your desktops audio or microphones output.

VoiceMeeter VAIO – VoiceMeeter Input (B1)
Starting with the farthest left channel in the Virtual inputs section, at the very top of the mixer it should say “VoiceMeeter VAIO”. This is our desktop’s audio and is directly linked to the default output in windows, “VoiceMeeter Input”.

For continuity, we’re going to right click at the top of this virtual input and rename it as “Desktop B1”.

Next to the fader’s on each of these channels and throughout the entire board, you’ll see these buttons.

These buttons are what you’ll use to monitor the desktop’s audio. Similar to the Hardware out section we just reviewed, the A1-A5 buttons are directly linked to the output devices you previously selected.
We’ll select A1 for our headphones, so now we can hear our desktops audio.

Also select A2, so our capture card will receive our desktop/game audio. We’ll leave the B1, B2 and B3 sections empty. To test it, open a random YouTube video and see if you can hear the audio.
Should look like this when done:

VoiceMeeter Aux – VoiceMeeter Aux Output (B2)
Next in the middle virtual input, should read as “VoiceMeeter Aux”. This is the channel that routes your microphone audio to be sent out to any app or game. So we’ll right click at the top, then rename this input to “Mic B2” just like we did for our Desktop audio.

DO NOT select any additional buttons for “MIC B2”, since it’s not needed for this Dual PC setup.

For the far right input “VAIO 3”, we’re not going to focus on that for now. This is technically another viable input that can be used to route audio. But not necessary to complete this guide, once you have a better understanding of VoiceMeeter you can use it as you see fit.

Hardware Inputs
The “Hardware input” section is equivalent to the inputs on a physical mixer. Except with VoiceMeeter you can assign both physical hardware (like a USB microphone) and digital audio signals from programs like Discord/Skype over to any one of the hardware inputs.

Let’s focus on setting up hardware inputs for both our microphone and Discord. These same steps can be applied for any other program or physical UBS device you wish to hook into VoiceMeeter.
Connecting Mic to VoiceMeeter
We’ll be setting up our microphone under “Hardware Input 1“. First lets rename the channel by right clicking the “Hardware Input” text and typing “Mic” into the text box, hit enter.

SIDE NOTE: IF YOU’RE ONLY HEARING AUDIO OUT OF ONE EAR, CLICK THE CHANNELS “MONO” BUTTON.
Next, click where it says “Select Input Device” and select your mic or audio interface from the drop down.

Remember our good friends, the buttons for Hardware Outputs A1 to A5? In this section of the mixer, they are here purely for monitoring the audio being plugged into this input.
Test your microphone to make sure its working, click the A1 button (our headphones). If you hear yourself, good! Its working as intended and you can uncheck the A1 button, unless you like the sound of your own voice.

SIDE NOTE: IF YOU’RE ONLY HEARING AUDIO OUT OF ONE EAR, CLICK THE CHANNELS “MONO” BUTTON.
Next lets look at the the B1, B2, and B3 buttons. This is where we we’ll route the microphones audio to “VoiceMeeter Aux”, the middle virtual input. Select B2 for Hardware input 1.

Remember how we renamed our virtual inputs? And how we renamed the middle channel to “Mic B2”? This is where it comes into play! Selecting the B2 button assigns your microphone to be output through “VoiceMeeter Aux Input”.
So now when you have to choose an input device for programs like Discord, you’ll choose “VoiceMeeter Aux Input”. Which we’ll show in the next step!
Connecting Discord to VoiceMeeter
Now that we have our microphone setup, we’re going to get discord plugged into the “Hardware Input 2” channel in VoiceMeeter.
To do that, let’s open up Discord and go to user settings. Then go into “Voice and Video”. For the input device, like we previously mentioned, choose the “VoiceMeeter Aux output” as our microphone.

Next for our output device, remember the “Virtual Audio Cable” you downloaded and installed? This is where it comes into play.In the output device drop down, select “CABLE Input”.

Now let’s move over to VoiceMeeter. We’re going to hook or “plug” our Discord audio into Hardware Input 2. Start by renaming the channel by right clicking at the top and typing Discord.

Click the drop down and select the same “CABLE Output” option. Just like that Discord and VoiceMeeter are now connected.

Now we need to enable monitoring for Discord, to do that, click the A1 button. Now you should be able any audio coming from Discord!
Should look like this:
IMPORTANT! RUN A MIC TEST IN DISCORD, IF YOU’RE MIC IS CRACKLING YOU NEED TO CHANGE THE SAMPLE RATE OF THE VIRTUAL AUDIO CABLE IN THE SOUND CONTROL PANEL TO 48khz. UNDER “PROPERTIES –> ADVANCED –> CHOOSE 2 Channel – 24 bit – 48000 Hz”

GAMING PC WRAP UP
Let’s review where we should be at by now, review the list and picture below and compare it to your mixer to ensure the gaming PC is setup correctly for VoiceMeeter Dual PC audio.
Hardware Input 1 – Mic: Make sure your mic is selected and is being picked up. ONLY THE B2 BUTTON SHOULD BE SELECTED AND THE MONO BUTTON SHOULD BE CHECKED.
Hardware Input 2 – Discord: Double check audio and video settings in discord, make sure they’re listed how we previously had shown. On the mixer, make sure the “Cable Output” is selected. ONLY THE A1 BUTTON SHOULD BE ENABLED.
Virtual Input – VoiceMeeter Input: this your desktop audios final mix. ONLY THE A1 AND A2 BUTTONS SHOULD BE ENABLED.
Virtual Input – VoiceMeeter AUX input: We have our mic being sent to this input. This is what will be selected in any program where your mic needs to be used. NO BUTTONS SHOULD BE SELECTED.
Lastly, for the love of God, SAVE YOUR SETTINGS!
Your mixer should look like this:

Setting up VBAN – Gaming PC
So now that we have our gaming PC setup, we’re going to connect it to our streaming PC using a network audio function built inside of VoiceMeeter called “VBAN”. VBAN uses your in home network to send audio from the gaming PC to the stream PC and is what drives the VoiceMeeter dual PC audio setup.
It’s recommended you have both PC’s hardwired directly to your router/modem for this, as Wi-Fi might pose stability issues.
Here’s what we’ll be routing from the gaming PC to the streaming PC:
- Hardware input 1 – Microphone
- Hardware input 2 – Discord
*Game/Desktop audio is routed through the capture card. So we won’t need VBAN for that!
VBAN Microphone Setup – Gaming PC
Right above the virtual input section of the mixer, you’ll see a greyed out button that says VBAN. Click that button to open the VBAN settings window.

In the top left of the window, click the “VBAN is OFF” button to enable VBAN on the gaming PC. It should now be highlighted saying “VBAN is ON”.

Find the “Outgoing Streams” section of the VBAN window. Let’s get our microphone’s audio sent to the stream PC first.

On the first row of the outgoing stream section, click the “ON” button. It will highlight green.
Next, we select the source. So were going to select “BUS B2” which is our microphones virtual input channel.

Name the audio stream “MIC” in all caps.

IMPORTANT: Name it something simple. The name will have to be exactly the same in VBAN on both PC’s in order to work!
Now we need to tell VoiceMeeter what IP address to send the mics audio to. Lets go to our Stream PC. Open up the VBAN window on the stream PC. Click the greyed out VBAN button in he middle of the mixer.

In the top middle of the window, you’ll see the IP address of your streaming PC.
Enter that IP address into the VBAN window on your gaming PC’s “Outgoing Streams” where it says “IP Address To” hit enter. After that everything else to the right of that can be left alone.

VBAN Discord Setup – Gaming PC
Once again, under “Outgoing Streams” section of the VBAN window. We’re now going to send Discord’s audio over our network to the stream PC. It’s the same exact process we just did for our microphone.
-On the first row of the outgoing stream section, click the “ON” button. It will highlight green.
-For our source, we’ll select “BUS A2” which represents Hardware Input 2. (Which can be confusing since the hardware outputs are labeled the same way)
-Name the audio stream “DISCORD” in all caps.
-Enter in the IP address the audio is being sent to, it will be the exact same address we used for our Microphone.
VBAN on the GAMING PC should look like this when complete:
Now we have both our Microphone and Discords audio streams going through our network. These are now ready to be received by VoiceMeeter on our Streaming PC!
Setting up VBAN – Streaming PC
These steps are going to be very similar to setting up VBAN on the gaming PC. Now we just need to setup VoiceMeeter audio on our streaming PC to receive the audio “Incoming Streams“. As well as sending an audio stream back to the gaming PC for Twitch alerts, subs, and donations.
BEFORE STARTING THIS PORTION OF THE GUIDE, DOUBLE CHECK YOUR WINDOWS AUDIO SETTINGS FOR THE STREAM PC. WILL BE THE EXACT SAME STEPS AS PROVIDED EARLIER.
CLICK THIS TO BE TAKEN BACK TO THE WINDOWS AUDIO SETTINGS SECTION OF THE GUIDE!
VBAN Microphone Setup – Streaming PC
First, since we haven’t done it yet, lets assign our hardware out for the streaming PC. Just select the default audio driver, ours is a RealTek HD Audio driver.

If it’s not already, open up the VBAN window and click the “VBAN is OFF button” to enable it on the streaming PC.

Next, like how we setup our microphones outgoing audio stream on the gaming PC we’re now going to setup the “Incoming stream”.
Click the “ON” button on the top row, should now be green. For the stream name type “MIC” all caps. (This MUST be spelled exactly the same in order to work on both PC’s correctly)

Next under “IP Address From”, we’re going to need to enter our gaming PC’s IP address. So slide over to the gaming PC’s VBAN window, find the IP address in the top middle of the window.

Enter that IP address into our streaming PC’s top VBAN row. The green box means the connection has been established.

Selecting the “Destination” is the last step. If you click the Destination window, a box will pop up showing “In #1 – #5 & virtual In #1 -3”. Select “In #1” which is our Streaming PC’s Hardware input channel 1.

What you just did was assign your gaming PC’s mic audio to the first hardware input of the streaming PC’s mixer! Tap the mic and do a little test!
Under the hardware input 1 we’ve just assigned our mic to, select the B2 button to route the mics audio to the “VoiceMeeter Aux Output” of our streaming PC.

Connecting the VBAN Mic to OBS
Now let’s connect our mics audio to OBS.Open up OBS, go to Settings and go to the “Audio” tab. For the “Mic/Auxiliary audio” input, select the “VoiceMeeter Aux Output”

Now your mic should be working in OBS properly!

VBAN Discord Setup – Streaming PC
Click the “ON” button on the top row, should now be green. For the stream name type “DISCORD” all caps.

Next under “IP Address From”, you can use the same IP address that we used for our mic. As shown below:

Selecting the “Destination” is the last step to complete. If you click the Destination window, a box will pop up showing “In #1 – #5 & virtual In #1 -3”.Select “In #2” which is our Streaming PC’s Hardware input channel 2.

For Hardware input channel 2 on the mixer, select the B1 button. This will mix the incoming Discord audio, and route it to mix with our Streaming PC’s Desktop Audio.

IMPORTANT NOTE! You don’t need to select any inputs for both Hardware Inputs 1 & 2. We’ve already assigned the incoming streams to these inputs.
VBAN Stream Alerts Audio Setup – Stream PC
Now that we have our mic and desktop audio being sent over to the stream PC, we need to use VBAN again to send our stream PC’s audio over the gaming PC.
This is going to allow you to hear stream alerts or sound effects, basically any desktop audio from the stream PC.
Open up VBAN on the streaming PC. Under “Outgoing Streams” on the top row click the “ON” button.

Next, for our source (once again I’ll call back to B1 = Desktop Audio) we’ll select “BUS B1”.Now we need to name the audio stream. Going to keep it simple and put “SPC” for “Stream PC”.

For the IP address, like before we’ll get that from the gaming PC’s VBAN window and enter that in. The green square means the connection is established.


Gaming PC – VBAN Stream Alerts Setup
Now let’s hop over the gaming PC’s VBAN window and get it to where we can hear what’s coming over from the stream PC. Same steps as above, just on the receiving end!
-Under the “Incoming Stream’s” click the “ON” button. You should also see the text “1 Stream Detected”
-For the “Stream Name” enter the SAME EXACT name as what’s listed on the stream PC. So let’s type in “SPC”.
-Next type in the address (grab that from the VBAN window of the Gaming PC).
Should look like this, green light meaning the connection is setup correctly!

To the right for its “Destination”, you can pick any open hardware input channel/BUS. I’ll just pick input 3 next to Discord.Click and select “In #3” from the drop down.

Now under out hardware input 3 channel, let’s rename the channel to “Stream PC” or whatever you would like. Next select the buttons for the hardware output device you wish to hear the streams PC’s audio. Select “A1” to enable audio monitoring through our selected device, no other buttons need to be enabled.

VoiceMeeter Dual PC Audio Setup Completed!
With that, you should now have microphone & game play audio going to the stream PC; As well as being able to hear your stream PC’s audio on your gaming rig.
VoiceMeeter is not for the faint of heart, but it excels at many features a majority of other streaming mixers fail at. Thankfully, you’ll now have all the knowledge necessary to use VoiceMeeter for your dual PC audio setup!
If you prefer a video format, check out the DweebHub tutorials YouTube!
Amazon and the Amazon logo are trademarks of Amazon.com, Inc, or its affiliates.