As an Amazon Associate I earn from qualifying purchases.
Discord is integral to streaming on Twitch, with it being the most widely used chatting app by gamer’s and content creators. A lot of streamers use Discord as a great way to grow a Twitch community, play with friends, and connect with other like minded folk who share the same interests. But as your community continues to grow, so will the activity of your Discord server. Causing an audio string of that distinct sound, the official Discord notification and its indistinguishable “boop-BOOP”. While streaming, this sound can become annoying to not only viewers but also for you, the streamer. But don’t worry, because it can easily be muted using a couple of different methods that we’ll show you below!
*This method works for XSplit, OBS Studio, and Streamlabs OBS Software*
Best Way to Mute Discord Notifications When Live on Twitch
Sure there are plenty of ways to mute Discord, by either muting the app all together, in Windows or closing Discord completely. But the best way to mute Discord notification sounds so they wont be heard on your Twitch stream, while still being able to chat with friends is to enable Streamer Mode. Streamer mode, once enabled, knows when you have OBS open and automatically mutes all notifications from Discord. Letting you focus on streaming and sparing viewers from having to hear constant notifications, all done with just a few simple steps.
How to Enable Streamer Mode in Discord
To find Streamer Mode, lets open our Discord app and go to our Discord User Settings.

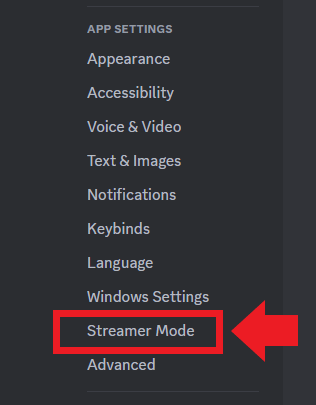
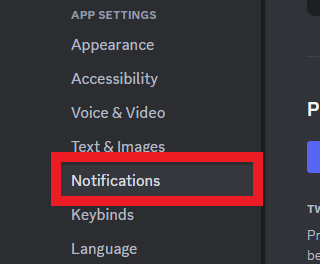
In your Discord Settings, head down to App Settings and click Streamer Mode.
At the very top, Streamer Mode is disabled by default. Click the toggle to enable Streamer Mode.
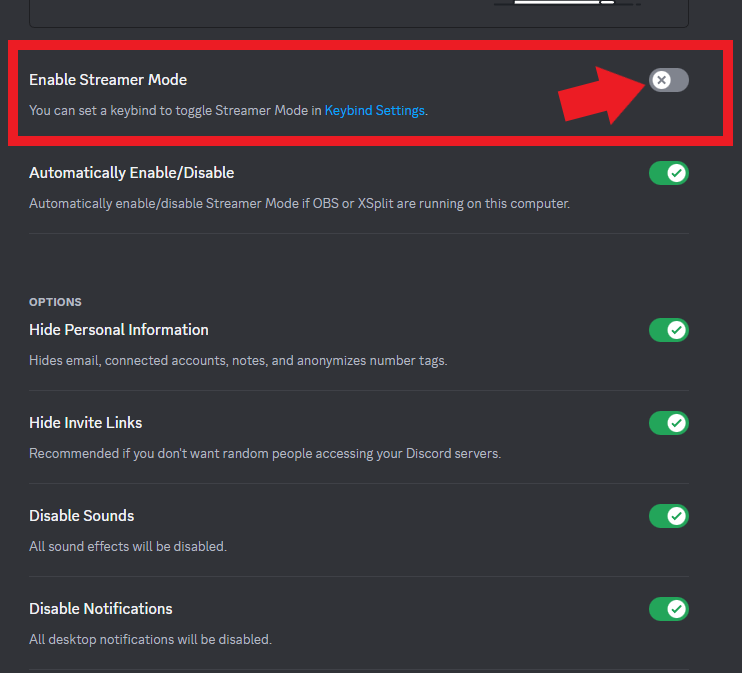
And now Discord Streamer Mode is enabled! With the default options shown above enabled, you wont hear any Discord notifications while Open Broadcast Software (OBS) or your preferred streaming software is open.
Different Ways to Mute Discord While Streaming
While Streamer Mode is the easiest way to mute Discord audio, you may want some other options that may suite your situation better. So we’ve gathered some other methods for making it easy quiet Discord so viewers don’t hear notifications when you are live.
Muting Discord Without Having Streamer Mode Enabled
Again, lets open Discord and go to our Discord User Settings by clicking the gear icon.
The navigate to the Notifications settings.
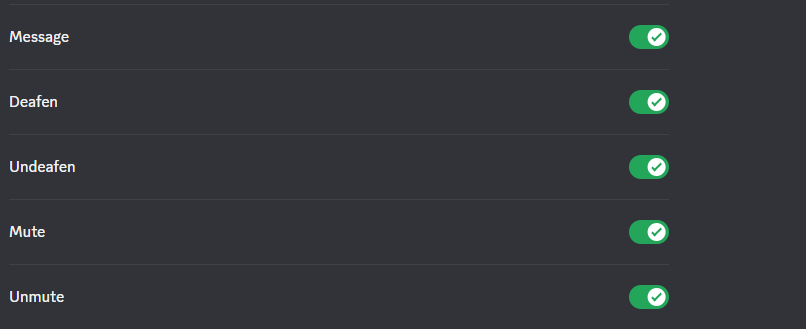
There are two sections that will mute notifications, first thing is at the the top. Toggle Disable All Notification Sounds, this will disable any sounds Discord plays through your desktop audio.

The second way, would be to individually toggle the notifications you don’t want to hear. Simply toggle what you don’t want your viewers to hear.
How to Mute Discord Using VoiceMeeter Potato
VoiceMeeter is a (freemium) digital audio mixer and is quite frankly, the only one of its kind on the market. It allows up to 5 different digital and physical inputs, includes 3 virtual audio devices, and can output/split audio to multiple output devices. It comes with a built in compressor and noise gate too, so you can tweak your mics audio just right and eliminate background noise. You can also use VoiceMeeter Potato to segregate your Discord Audio so you are able to hear it, but not your viewers.
If you’ve never used VoiceMeeter Potato (or VoiceMeeter Banana), we think its a great idea to check out some of our previous VoiceMeeter guides to get a better understanding on how to use the mixer effectively. We go over everything from setting VoiceMeeter as your PC’s default device, to using VoiceMeeter for Dual PC setups. These guides will get you setup to follow the next steps:
Assuming you’ve followed the above guides and have installed both VoiceMeeter Potato, plus the virtual audio cables. These next steps only help if you have your mic working in VoiceMeeter and have it connected to Discord. Always make sure to double check Windows hasn’t changed audio sources after reboot. Right click your speaker icon, go to sounds and verify all settings are correct.
Next we’ll go over how to split Discord audio (notifications, Discord Chat, Audio call’s) so only you can hear it and not your viewers. What you should have completed:
- Assigned VoiceMeeter Potato or Banana as our Window’s default audio device – You can verify this by checking your Windows Audio settings (sometimes windows likes to change these randomly)
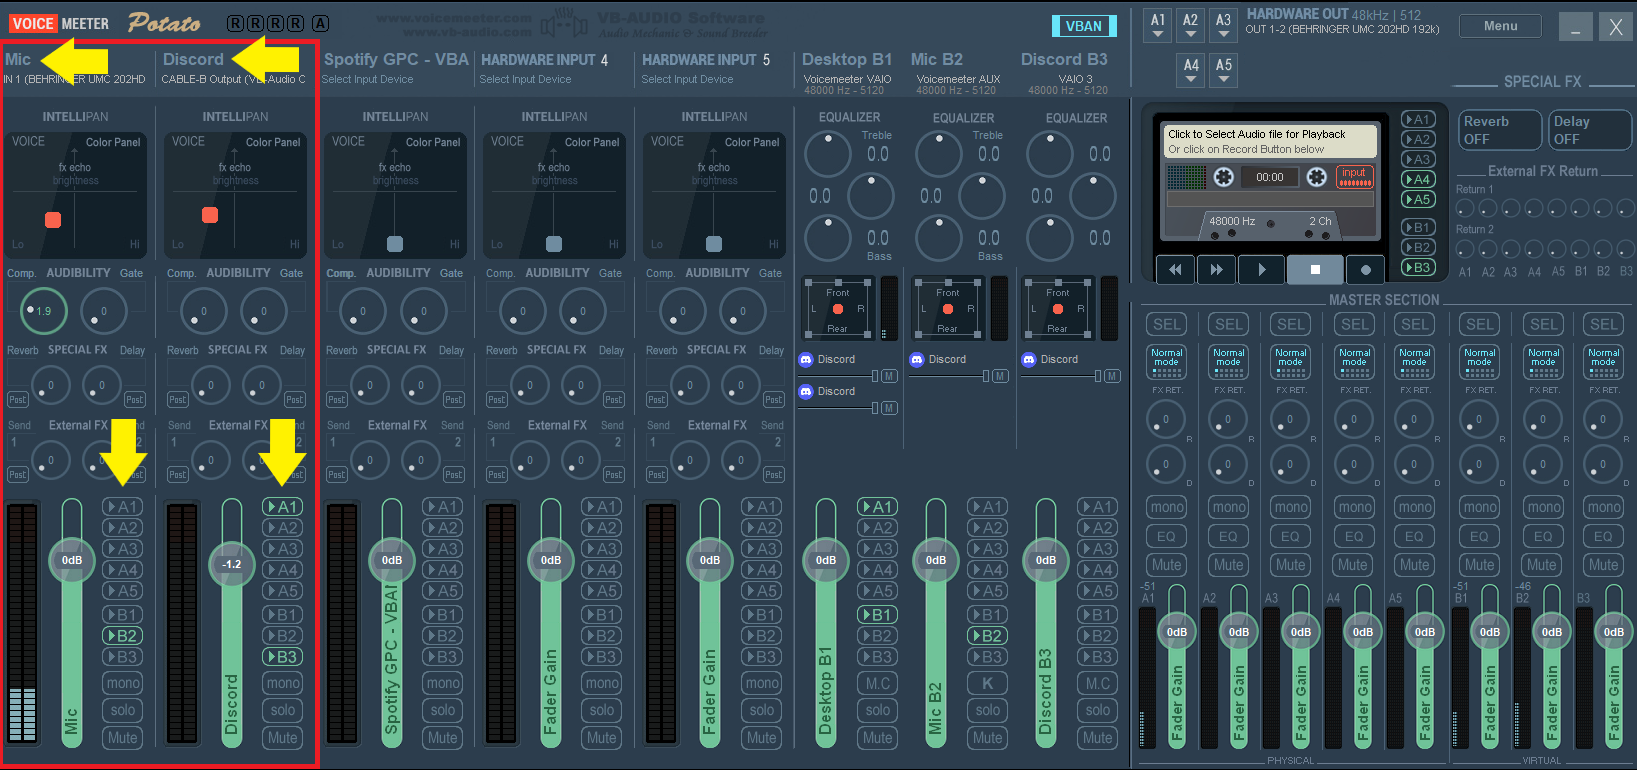
- Microphone assigned to Hardware Input 1 – Only select the B2 button, this assigns the mic’s input audio to VoiceMeeter Aux Output.
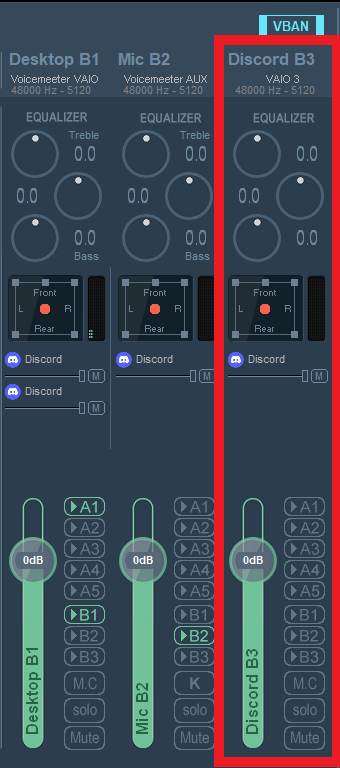
- Connect Discord to VoiceMeeter using a Virtual Audio Cable – Select the A1 button so you can hear all Discord’s audio and select B3 so Discord’s audio is routed to Virtual Input 3 VAIO3. This allows us to split audio Discords chat audio, giving you the ability to mute when needed in OBS.
Assigning Discord to Virtual Output 3 (VAIO3)
With our mic assigned to Hardware input 1 as well as Discord to Hardware Input 2, lets get sure our incoming audio is routed correctly. By assigning Discord to VoiceMeeter’s Virtual Input VAIO3, it separates Discords audio from being mixed with your game audio in OBS.
In Hardware Input 1, route your mics incoming audio to B2 (VoiceMeeter Aux Output).
For Hardware Input 2, route Discord’s incoming audio to B3 (VoiceMeeter VAIO3 Output).
 Click to Enlarge
Next, on the Virtual Input section of the board, rename this input by right clicking in the empty space above VAIO 3.
Rename it Discord B3. DO NOT SELECT ANY BUTTONS!
Connecting Discord and VoiceMeeter to OBS Studio
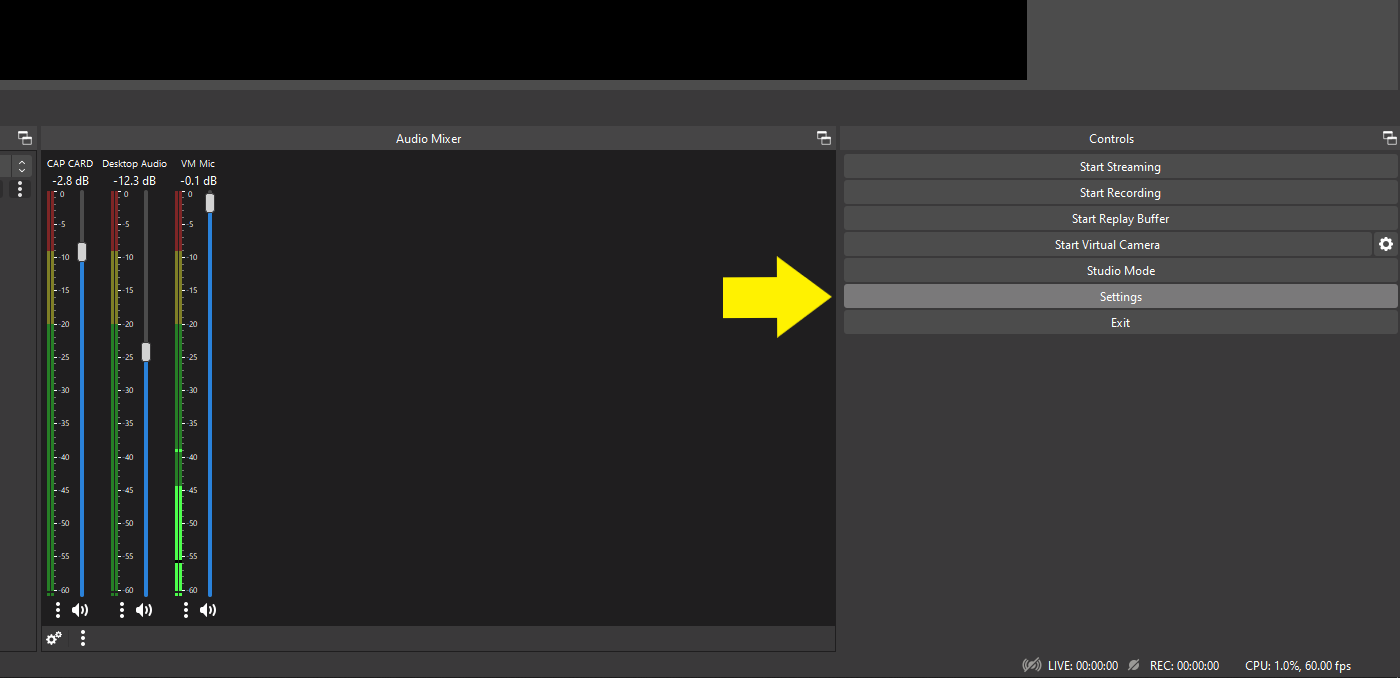
Now lets open OBS Studio (Open Broadcaster Software) and select Settings.
Next step, under the Audio tab lets take Discord/VoiceMeeter and connect it to OBS.
From the Under Mic/Auxiliary Audio 2 drop-down menu (or any open inputs) select VoiceMeeter VAIO3 Output (VB-Audio VoiceMeeter VAIO3).

This will create a new source input in OBS’s Audio Mixer, it will show as Mic/Aux 2.
It will show as Mic/Aux 2, lets rename it to Discord.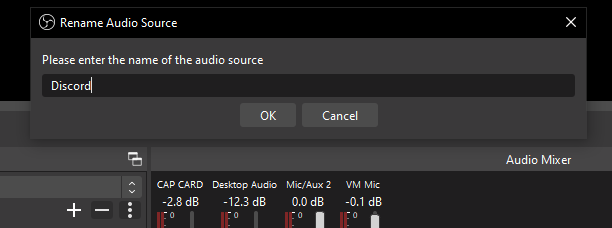
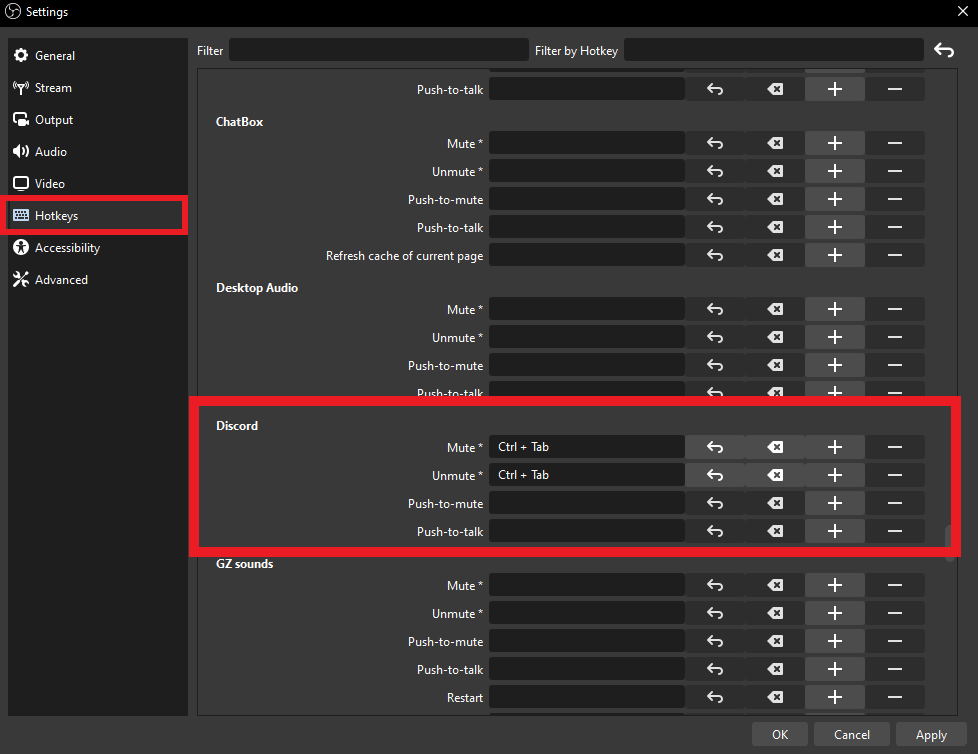
The last thing we need to do is to setup a hot key to mute our new audio channel in Discord.
Under Hotkeys, find Discord and assign a hotkey (we just used Ctrl+Tab).
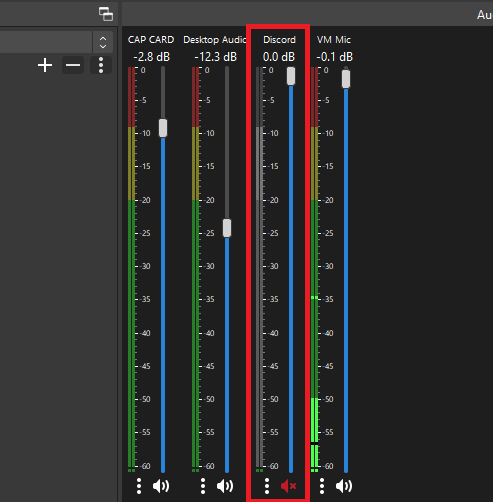
Now we can mute the OBS Discord audio on the fly. Simply by pressing the assigned hotkey. You’ll see when its muted in your audio mixer panel, the speaker icon is X’d out.
And with that, know you know how to mute Discord on your Twitch stream!
Amazon and the Amazon logo are trademarks of Amazon.com, Inc, or its affiliates.