As an Amazon Associate I earn from qualifying purchases.
One of the best features of VoiceMeeter Potato, is it allows users to send their PC’s audio to multiple hardware devices. Users can simultaneously split audio using VoiceMeeter Potato, up to 5 devices. Still haven’t found a purpose to use all 5 options but its nice to know its there! Since Windows doesn’t provide an easier way to split audio, it’s nice to be able to listen to game play or music, using either my headphones or desktop speakers. In this simple guide we’ll go over how to split audio in VoiceMeeter Potato!
If you don’t have VoiceMeeter installed already, we HIGHLY suggest starting with our super easy VoiceMeeter Setup Guide!
Hardware Output Selection
With VoiceMeeter Potato (or Banana) you’ll want to focus on the “Hardware Out” section on the mixer.
Here you’ll see boxes A1 through A5, this is where you are able to select multiple hardware devices to send audio out to. Meaning headphones, speaker, etc.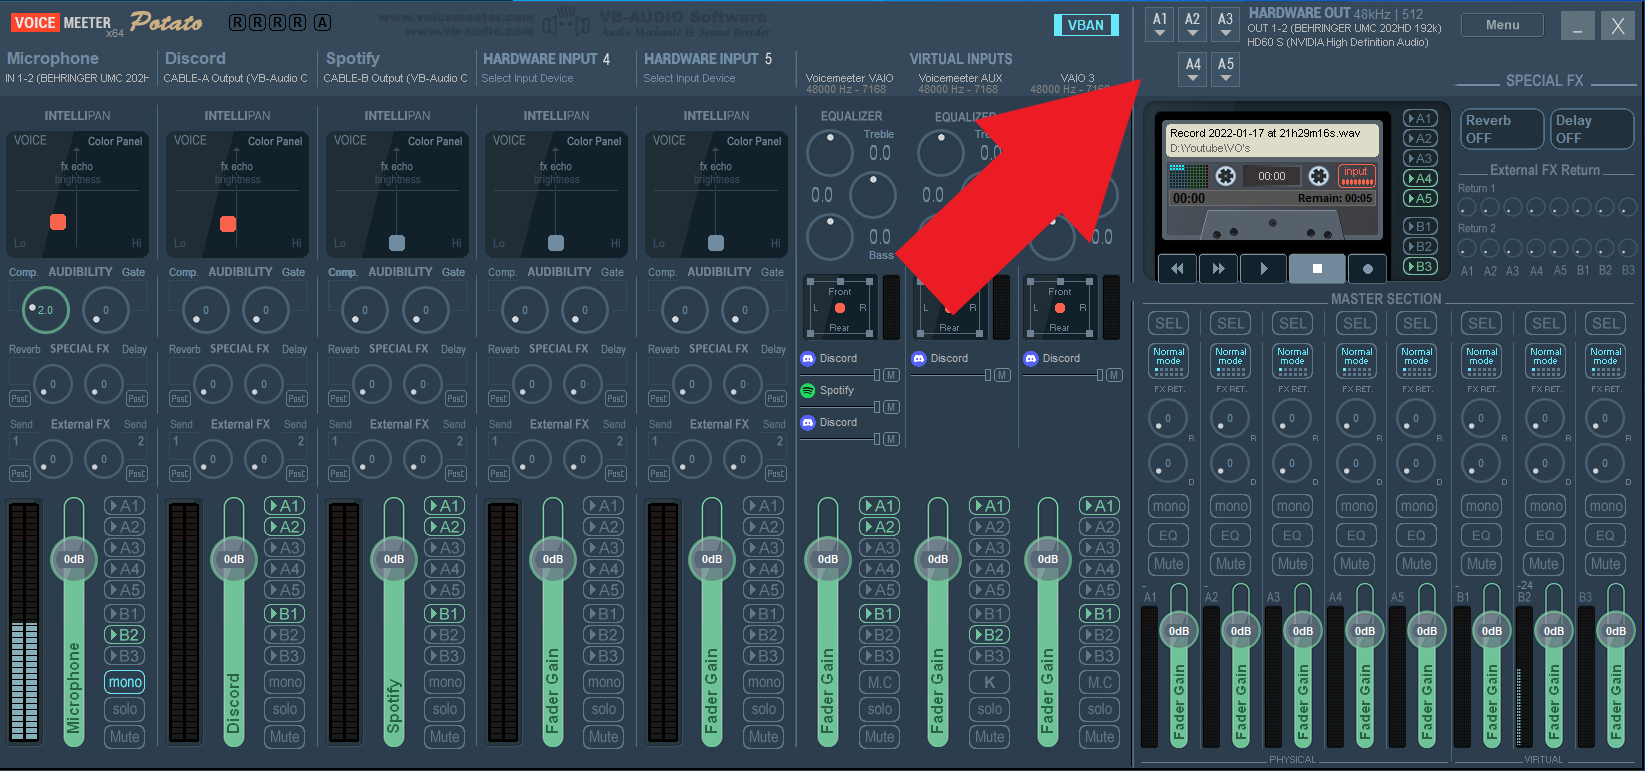
Splitting Audio using VoiceMeeter
Select Listening Devices
To split the audio in VoiceMeeter, we’ll need to select the listening devices you wish to use on the hardware output section of the mixer first.
Click on the A1 box. Choose the first hardware device you want your PC’s audio sent to.
In the example below, we chose our Behringer audio interface which is where our headphones and mic are plugged into.
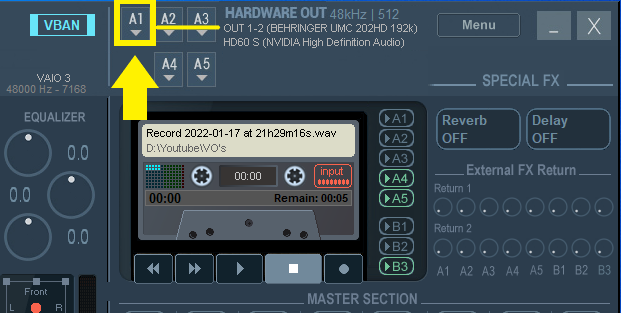
Next Click on the A2 box. Choose the second hardware device. (In this example we selected our HD60s capture card.)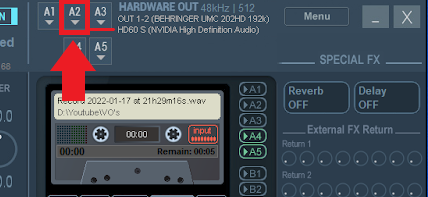
(Since I use a dual PC setup using my Elgato HD60s, VoiceMeeter allows me to route my gaming PC’s audio to my capture card directly. Which will then send it over to my streaming PC.)
Now we have our 2 output devices selected, next we’ll go over how to properly route and split the audio between multiple hardware outputs.
Routing Audio and Splitting Audio – Hardware Outputs
Now we have our two output devices selected. Next we’ll need to tell the hardware inputs where we want the audio to go.
For this guide we’ll focus on a channel we have set up already set up for Discord.
If you need a guide on how to connect VoiceMeeter to Discord, you can check out our “How to connect VoiceMeeter to Discord” guide.
Every hardware input or “channel” has a list of buttons next to the fader. Look for the buttons that have A1 through A5 listed.
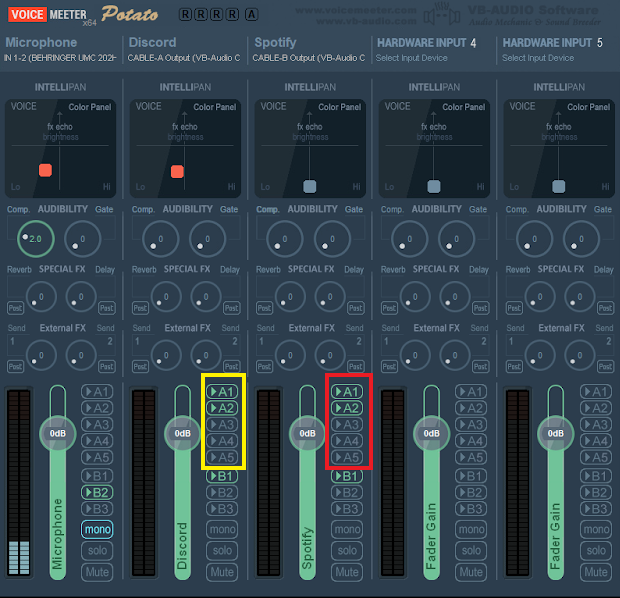
The A1 through A5 buttons on the hardware input section of the board, were we connect Discord and Spotify, are directly linked to the A1 through A5 buttons on the hardware output section of the board.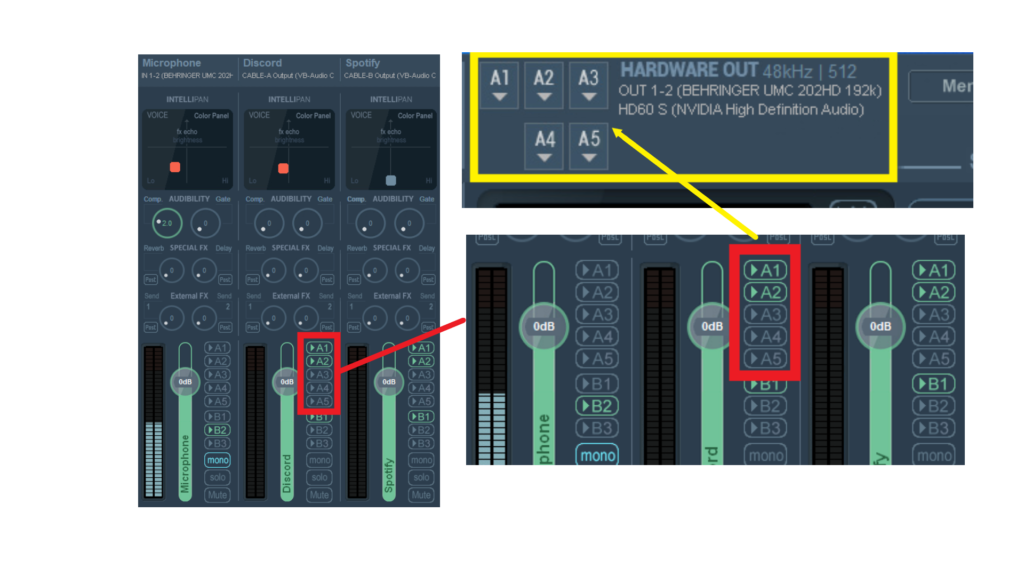
Next, its as simple as selecting A1 if you would like the audio sent to Behringer Audio interface (or whatever your main listening device is).
Then select A2 to send audio to our capture card, or any other device you want to split the audio between.
Want to use VoiceMeeter for your Dual PC Setup?
We got you covered in our “Ultimate VoiceMeeter Dual PC Audio Setup” guide!
What you can do split audio with VoiceMeeter Potato
And that’s it! Its pretty simple in concept and will definitely take some repetition to become more familiar. You just need to remember, everything A1 through A5 is relative.
So feel free to send audio to any device you wish. Want to listen to music in your headphones but hear game audio on desk speakers? You can do it! (not sure why you’d want to though)
Hope this helps!
Amazon and the Amazon logo are trademarks of Amazon.com, Inc, or its affiliates.